Customer dashboard "Advance Payments" overview
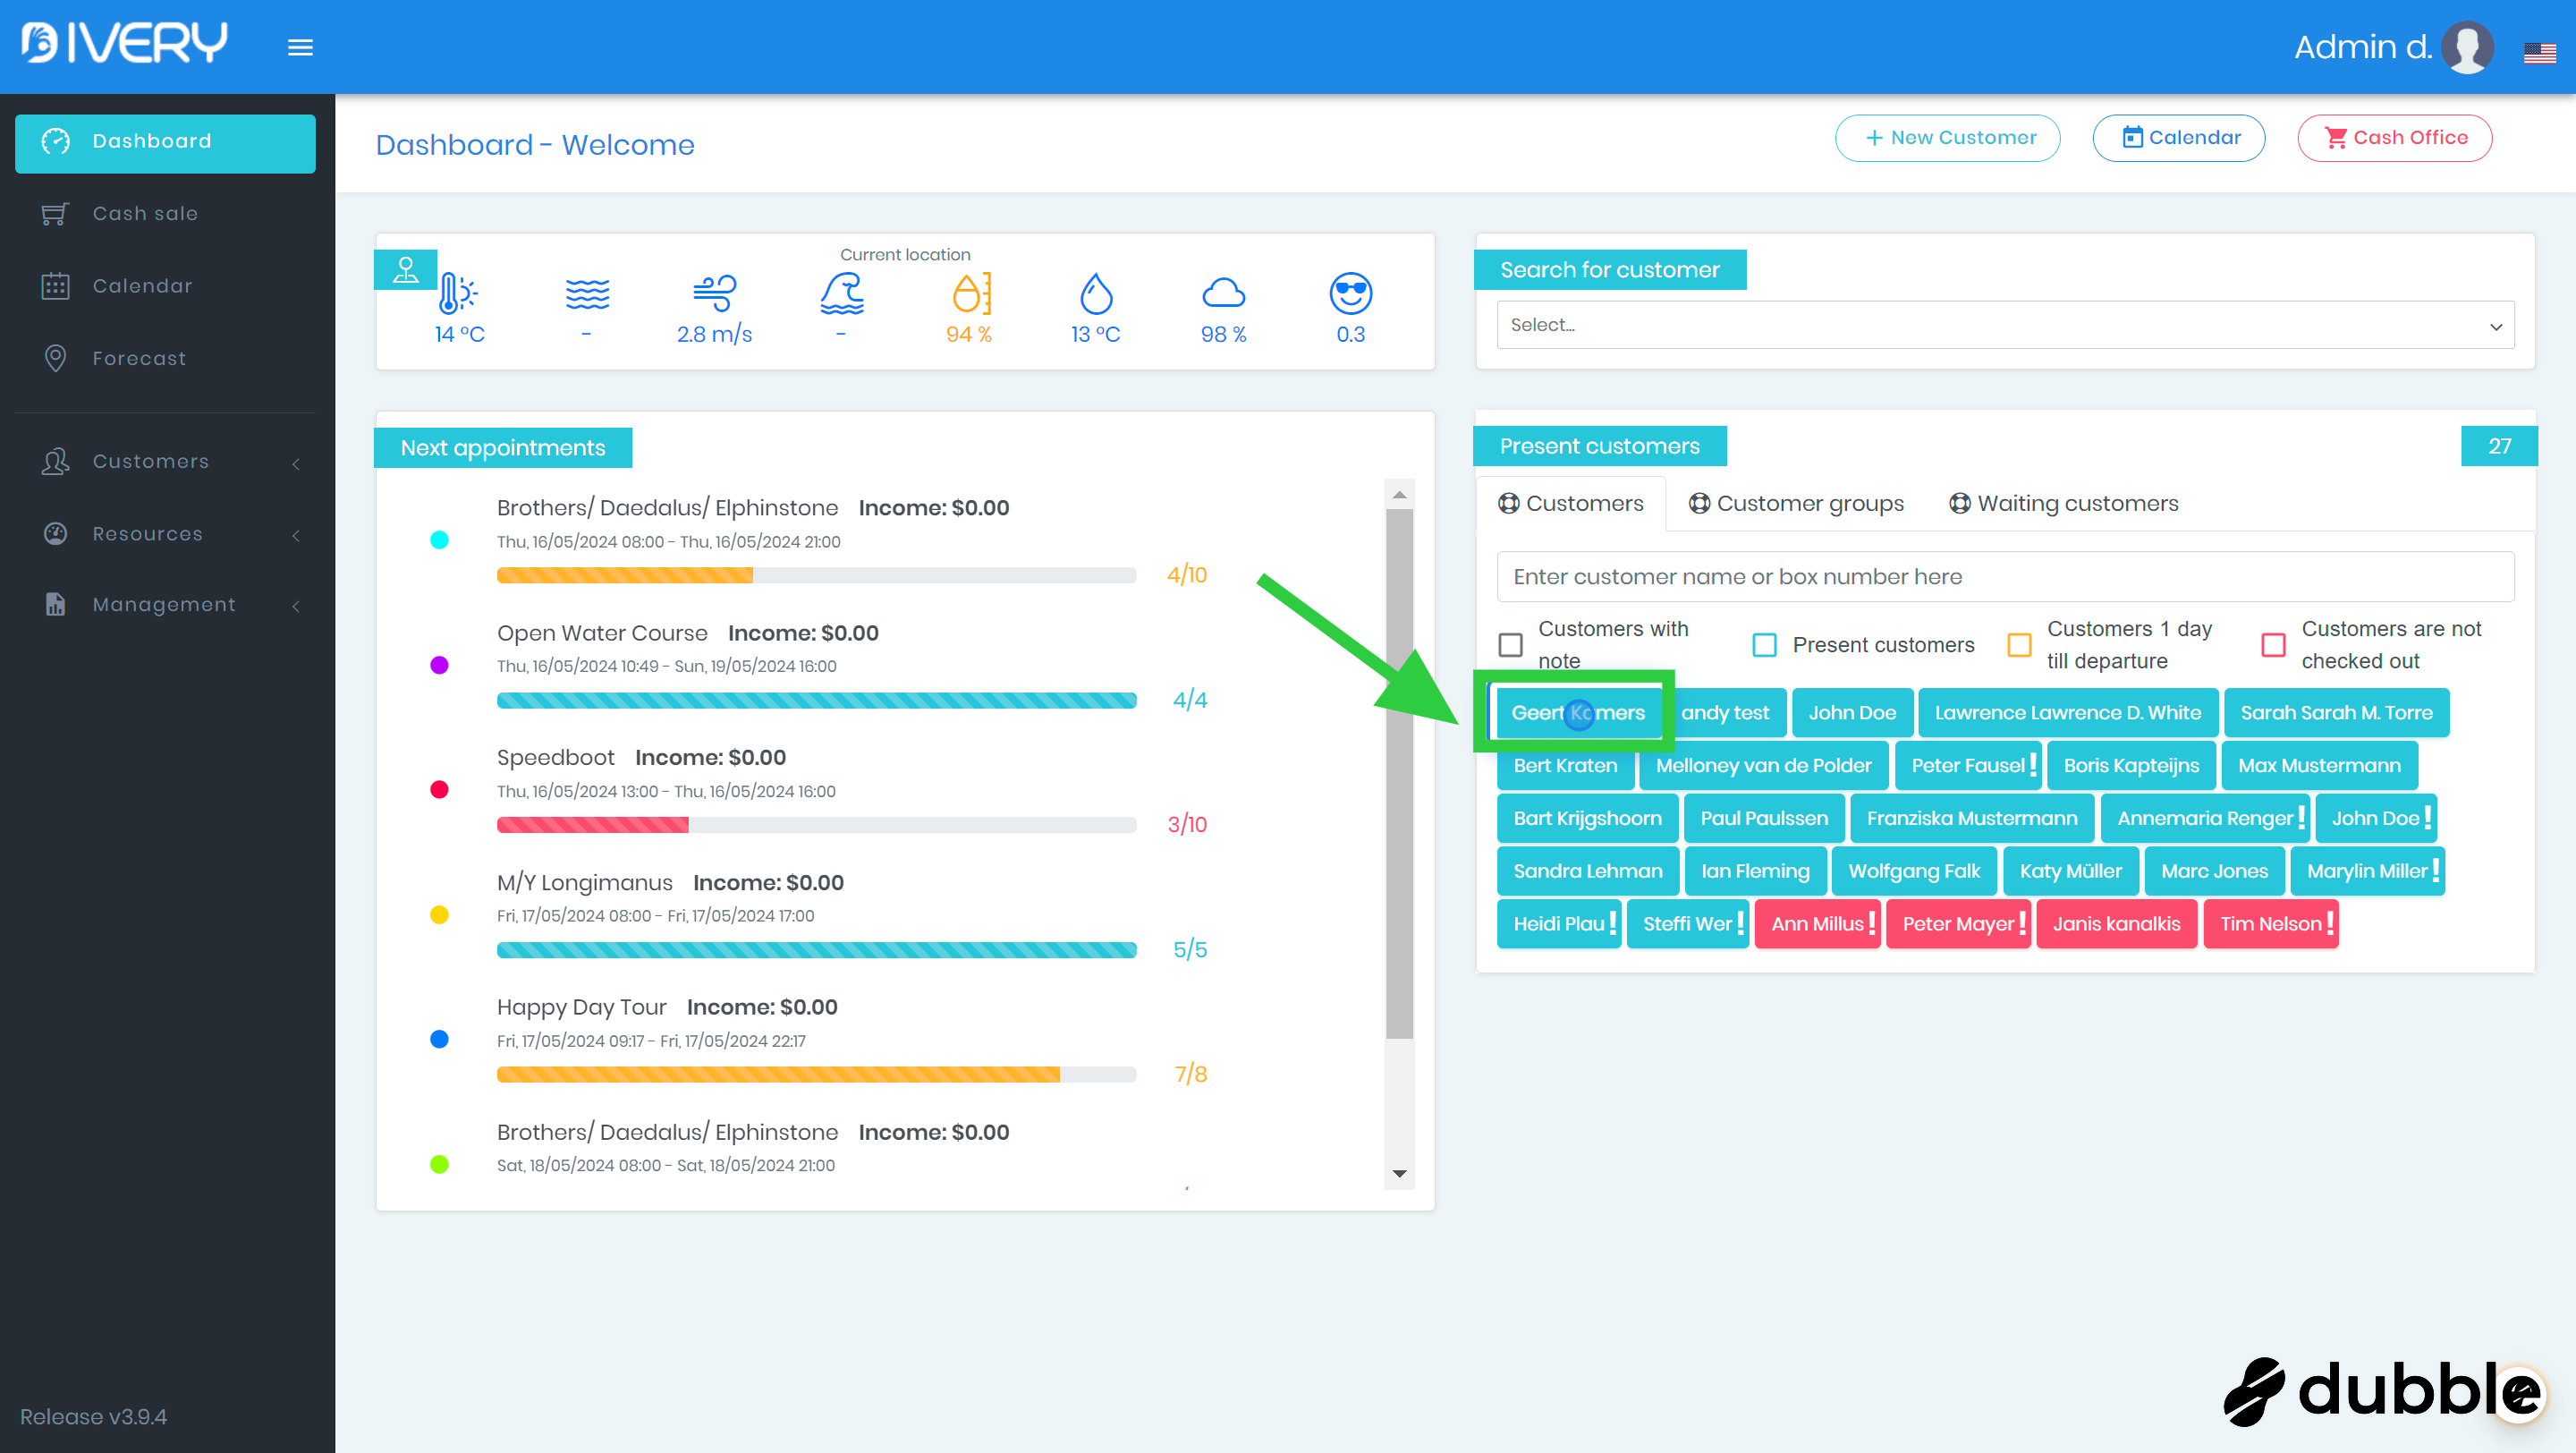
1. Click on a customer
Click on a customer in the center dashboard.
Alternatively, you can search for a customer or go to the customer list and select one there.
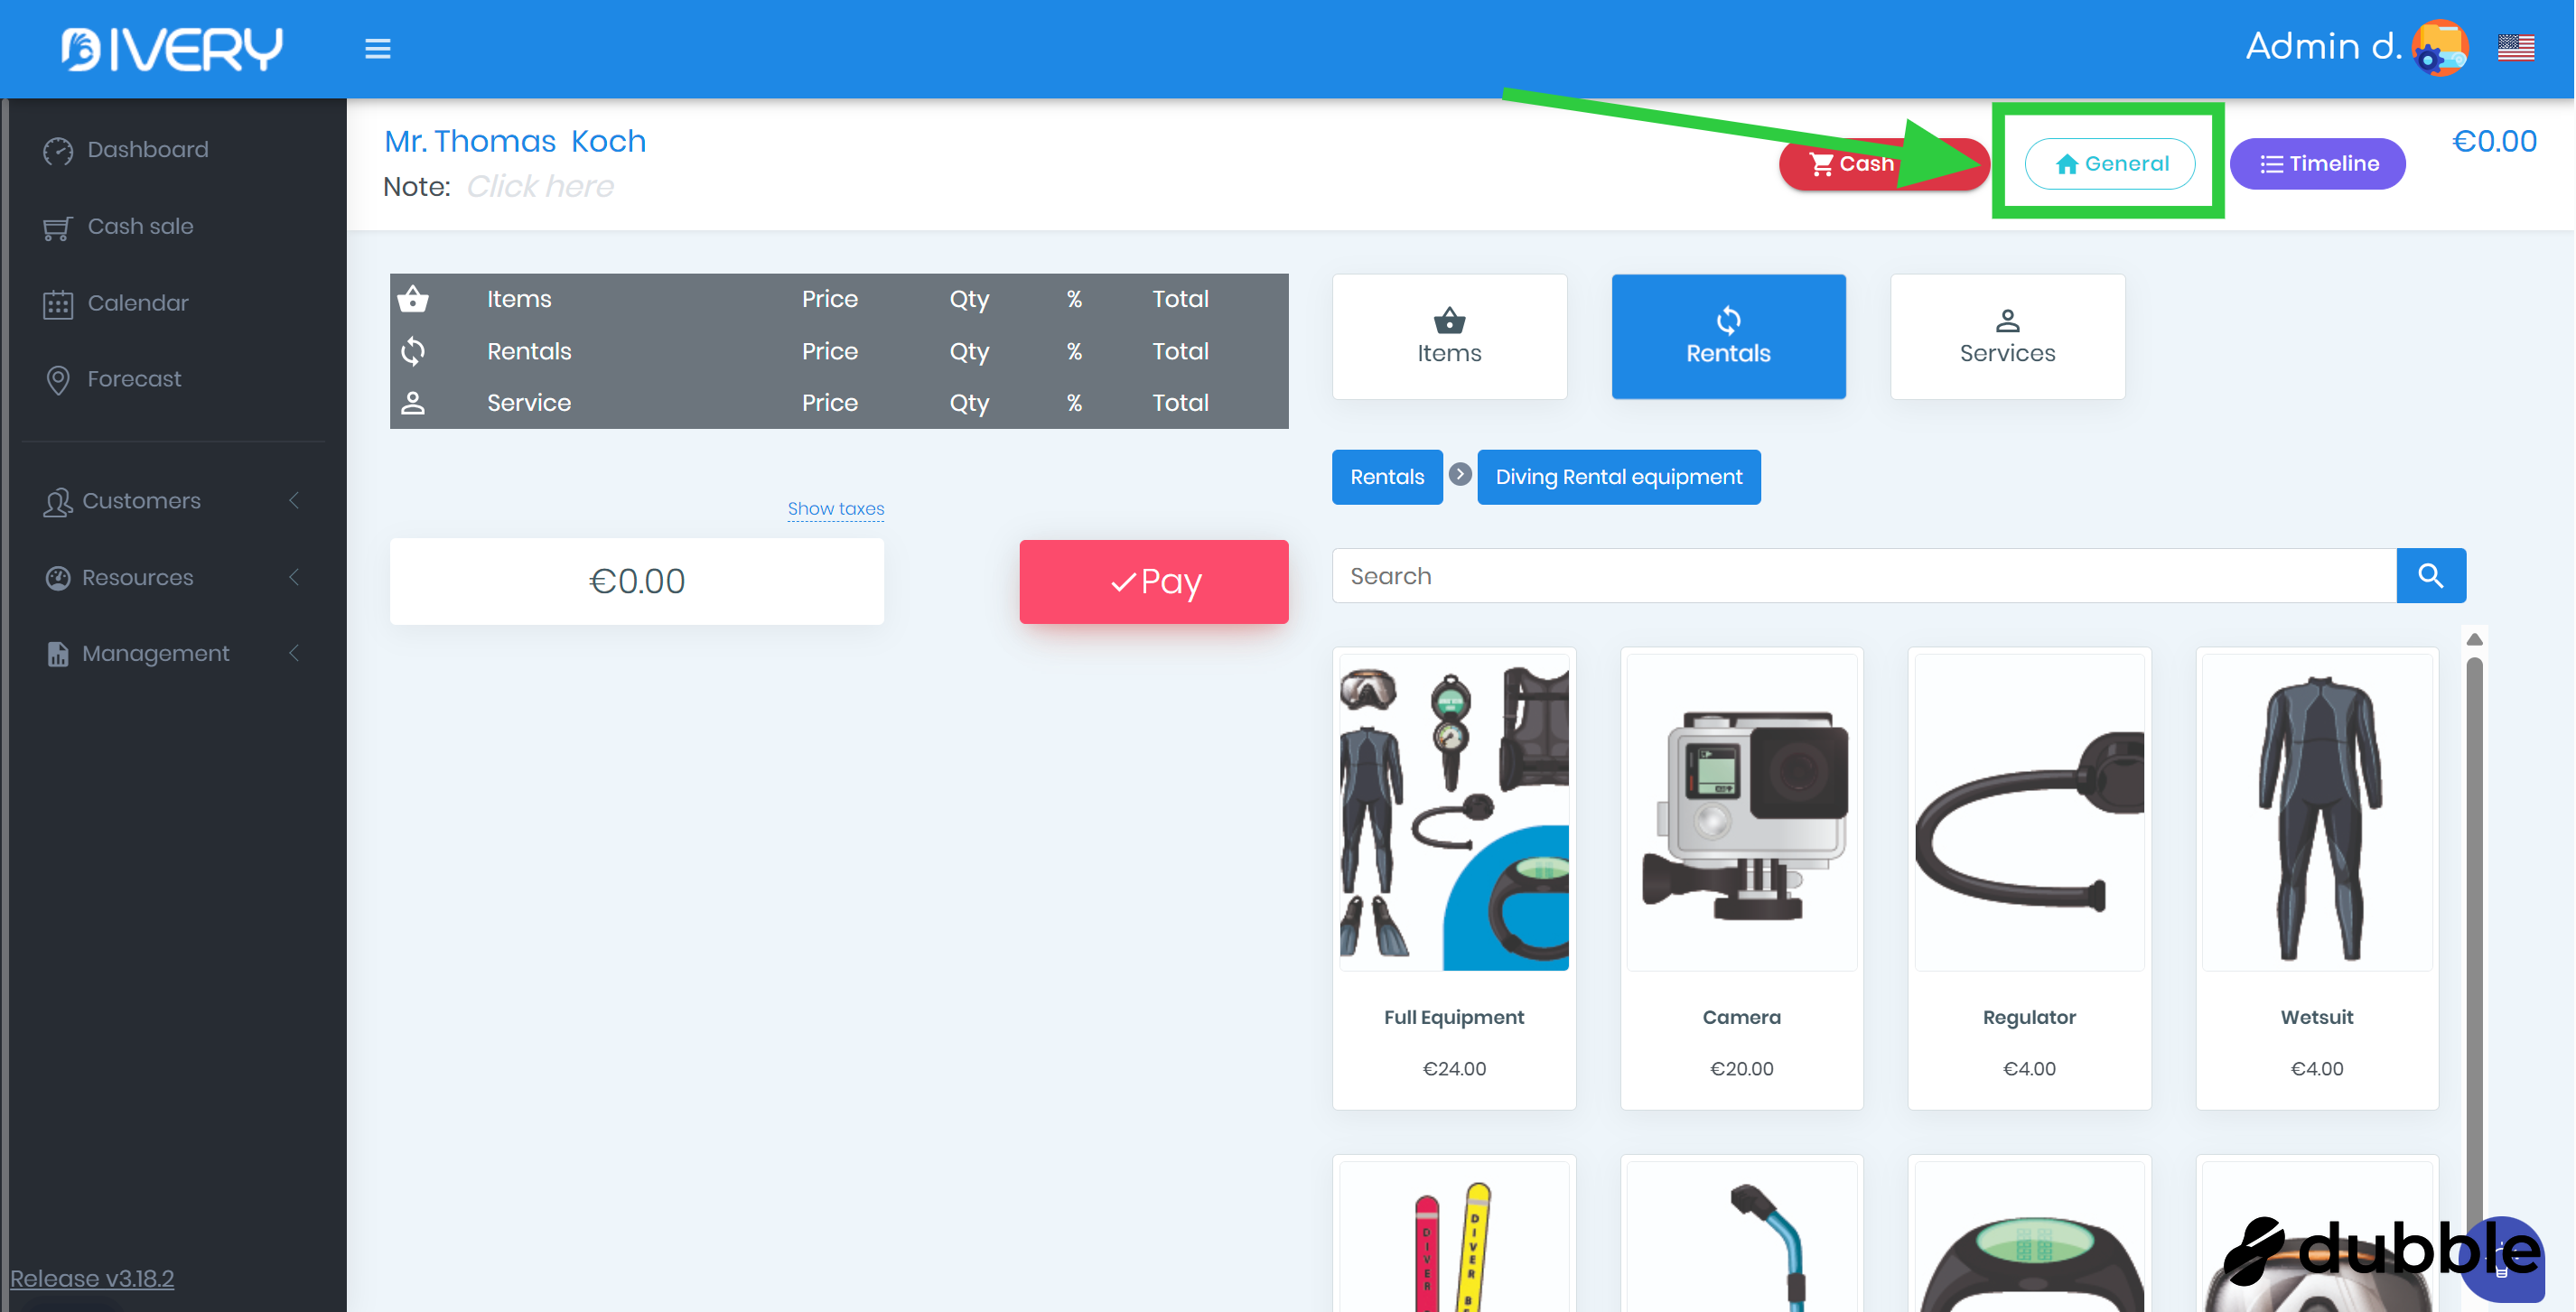
2. Click on "General"
Click the "General" button to view the customer's information page.
3. Select the "Transponder" tab
Make sure the tab, labeled "Transponder" , is selected.
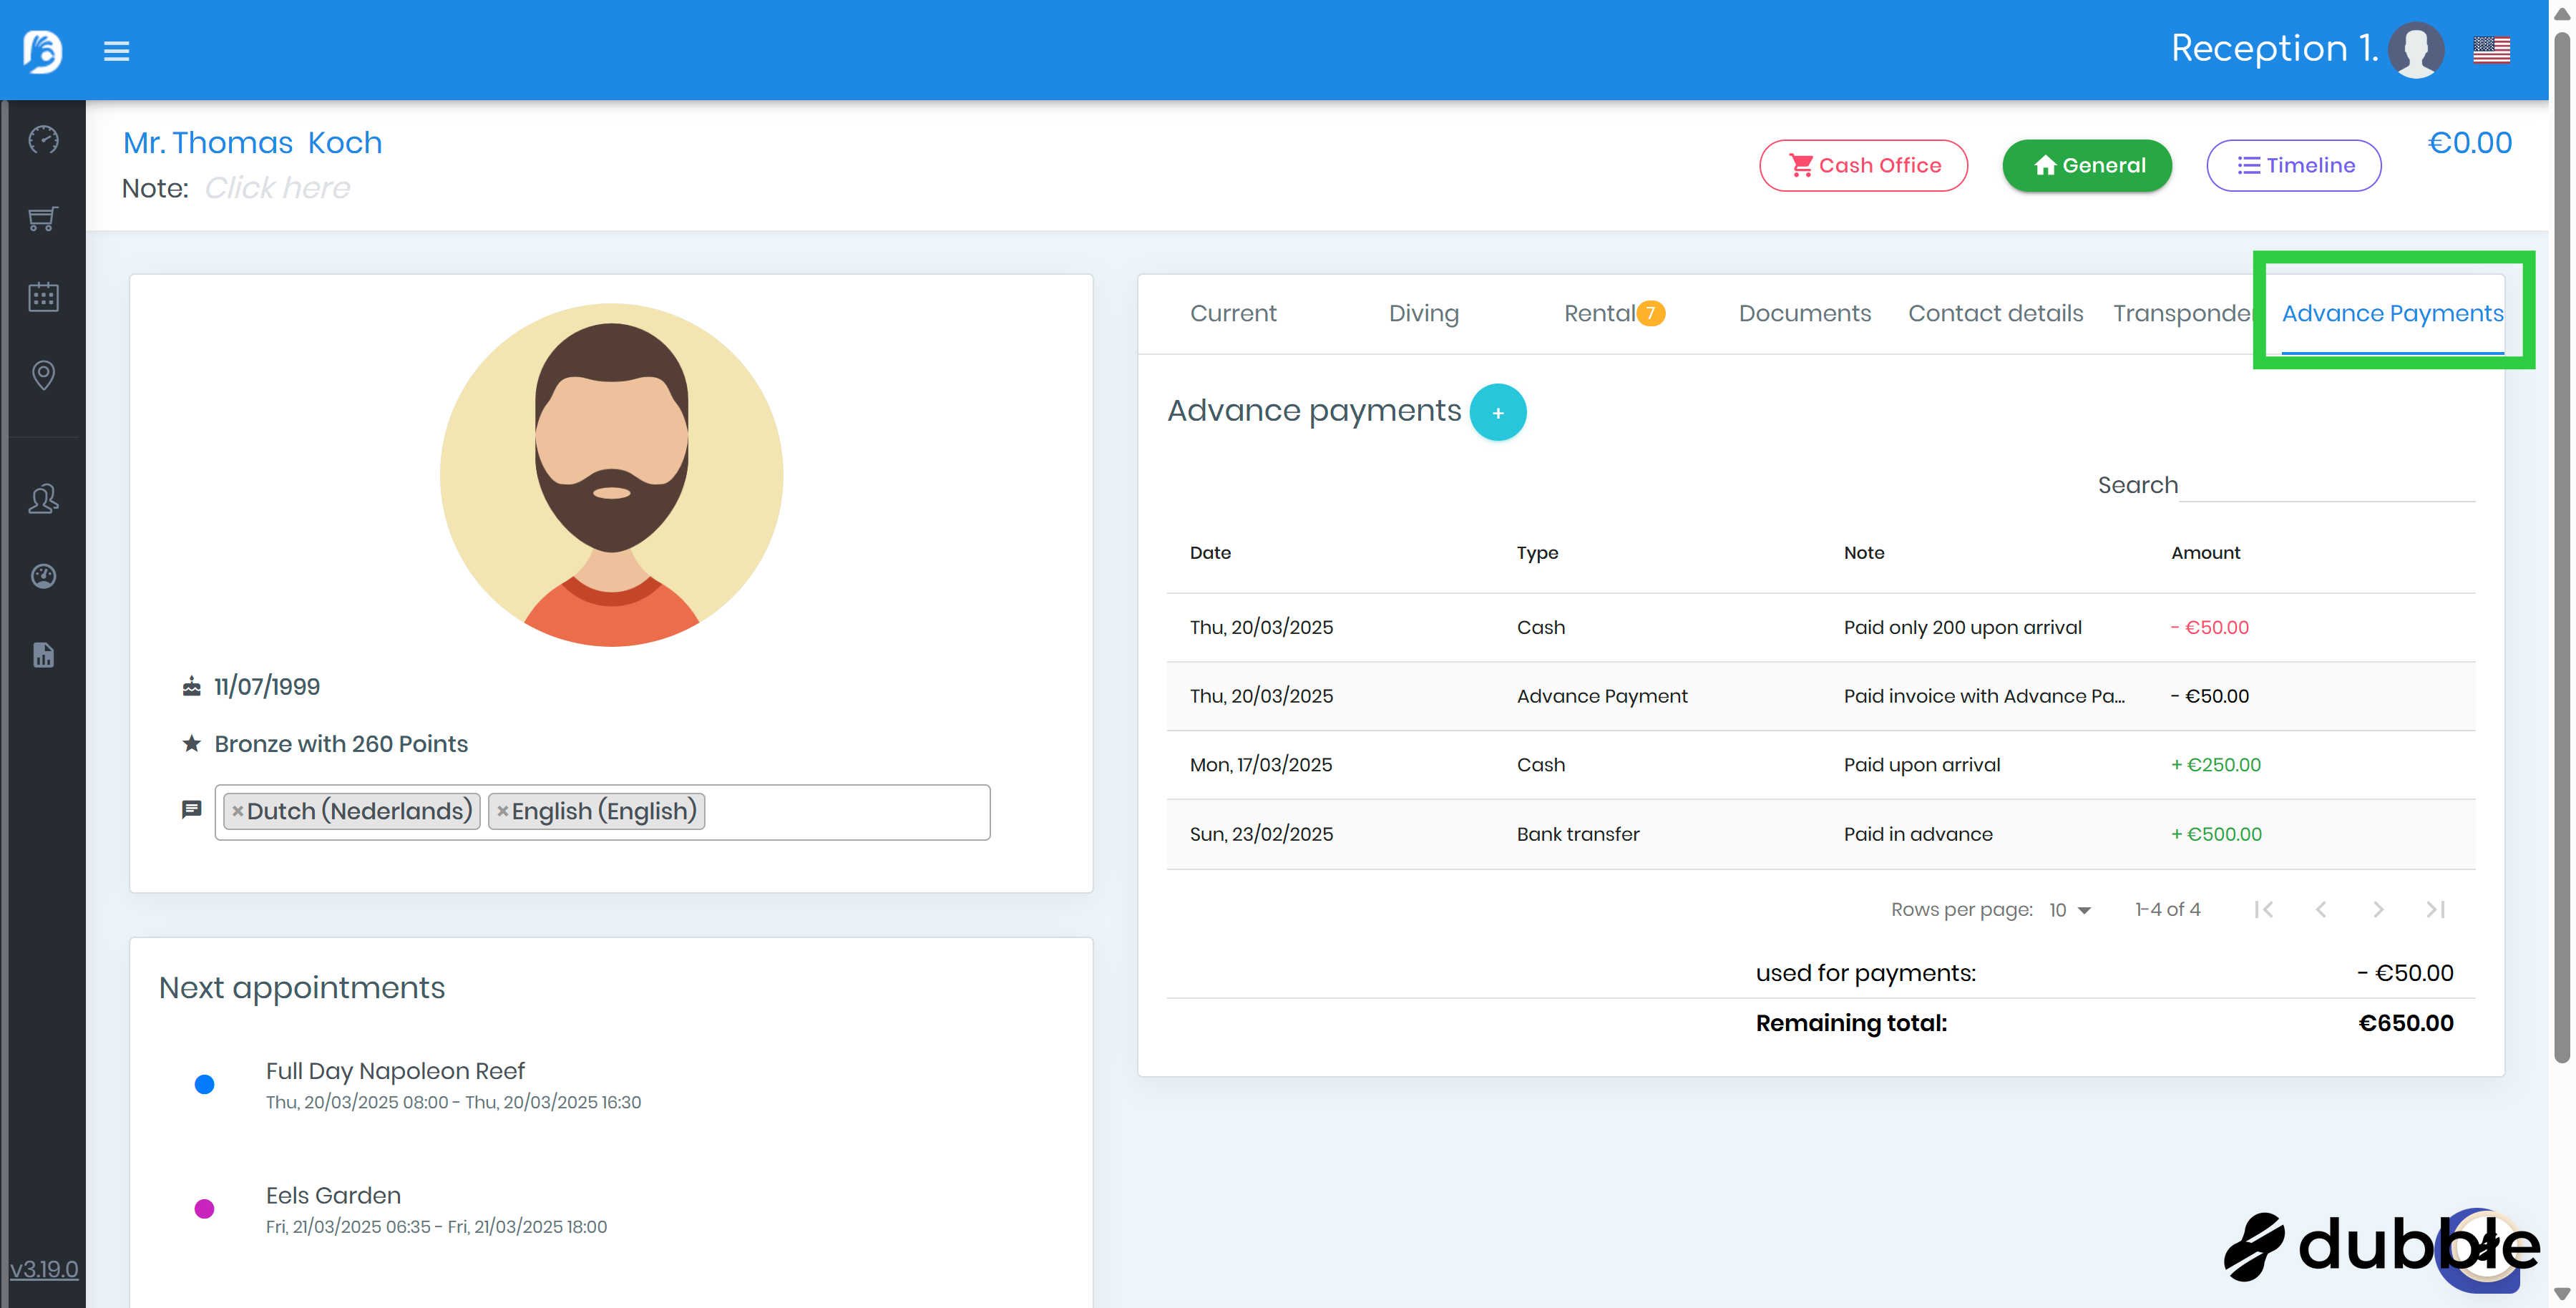
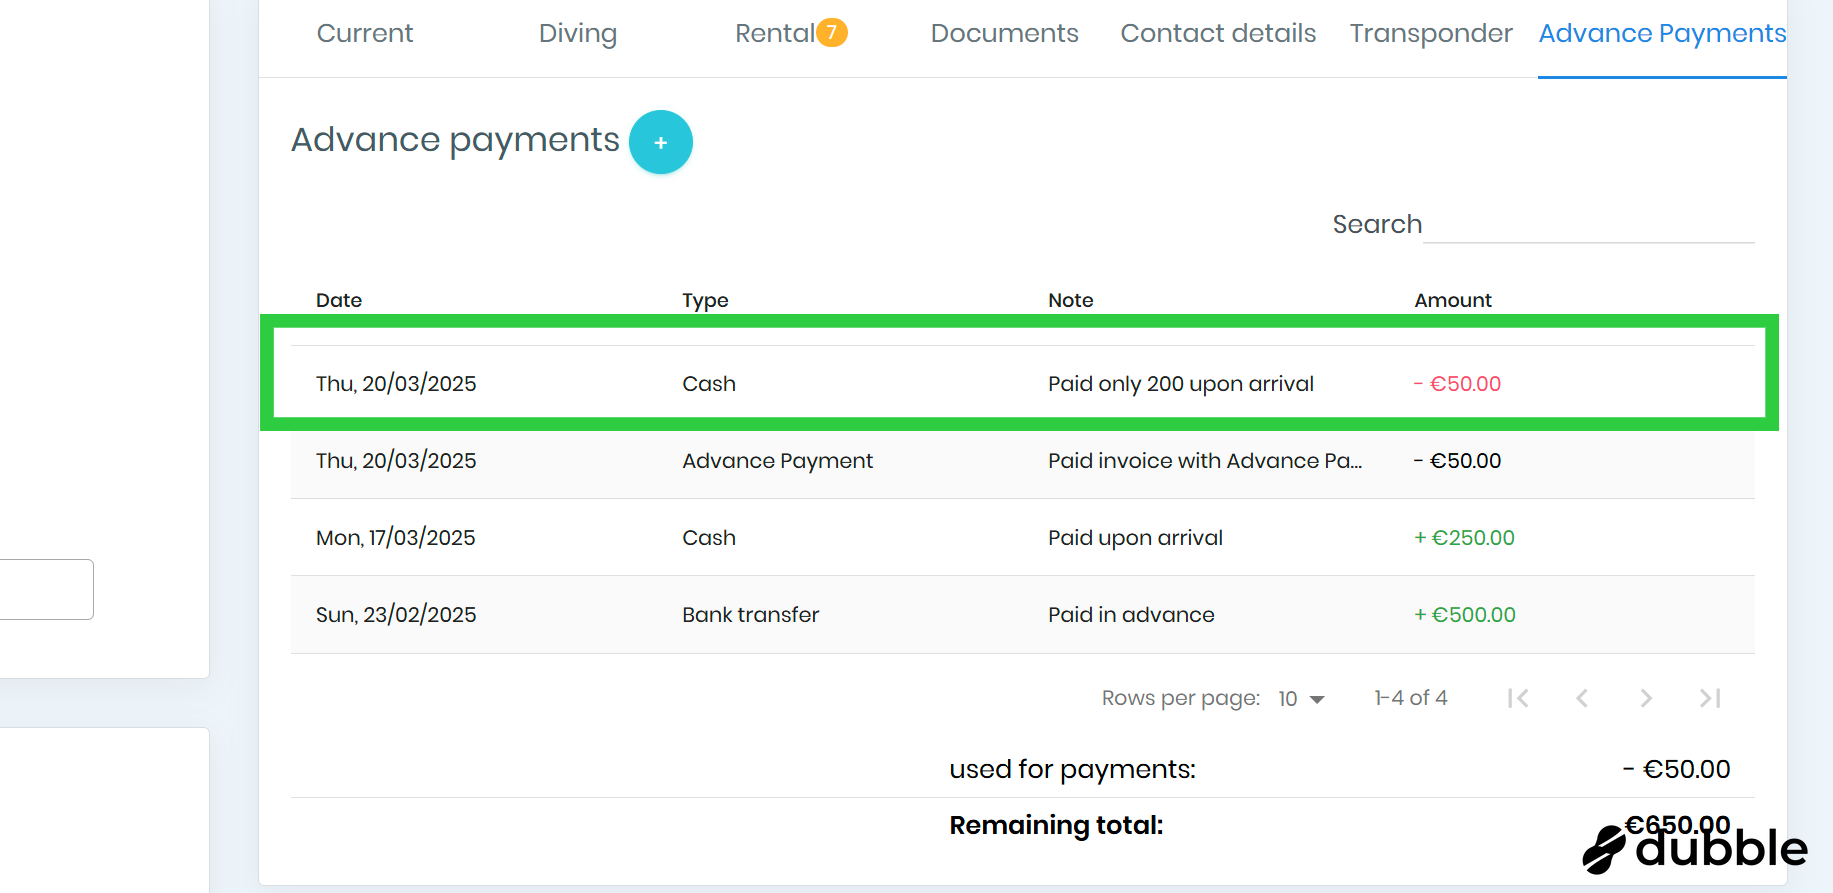
4. Deposits
In the table you can see all actions regarding advance payments.
You can see all deposits made by a customer.
For each deposit made you can see:
-
the date it was made
-
the type (bank transfer, cash, voucher, other)
-
a note that was added when the deposit was created in Divery
-
The amount that was deposited
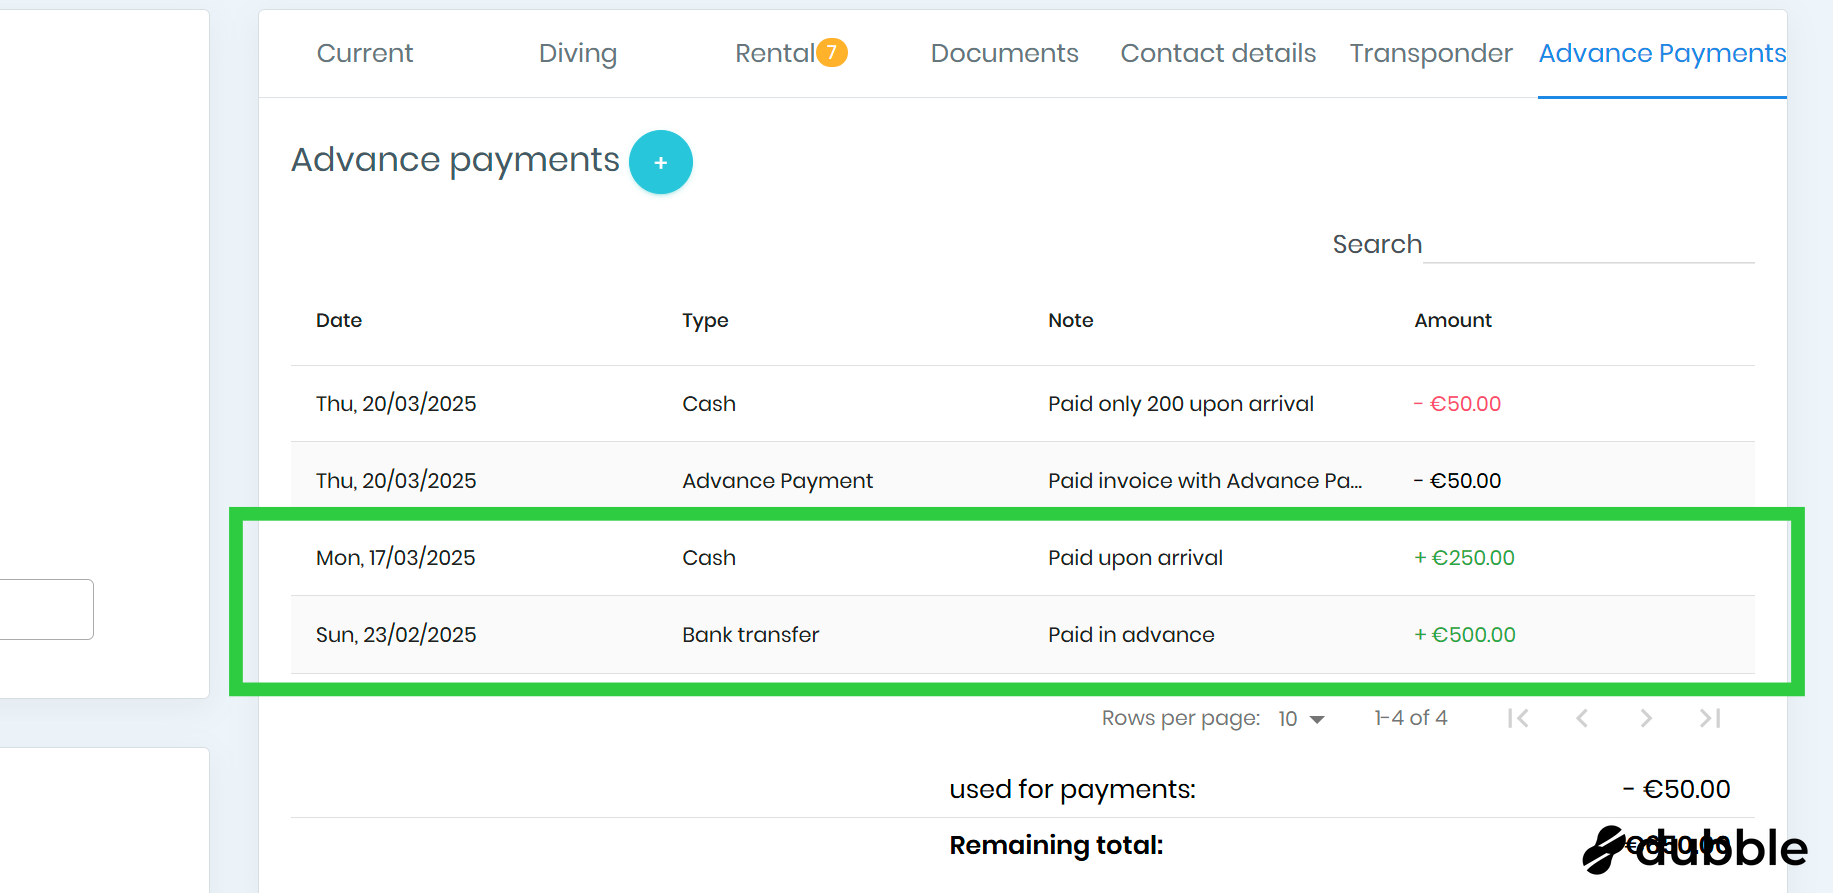
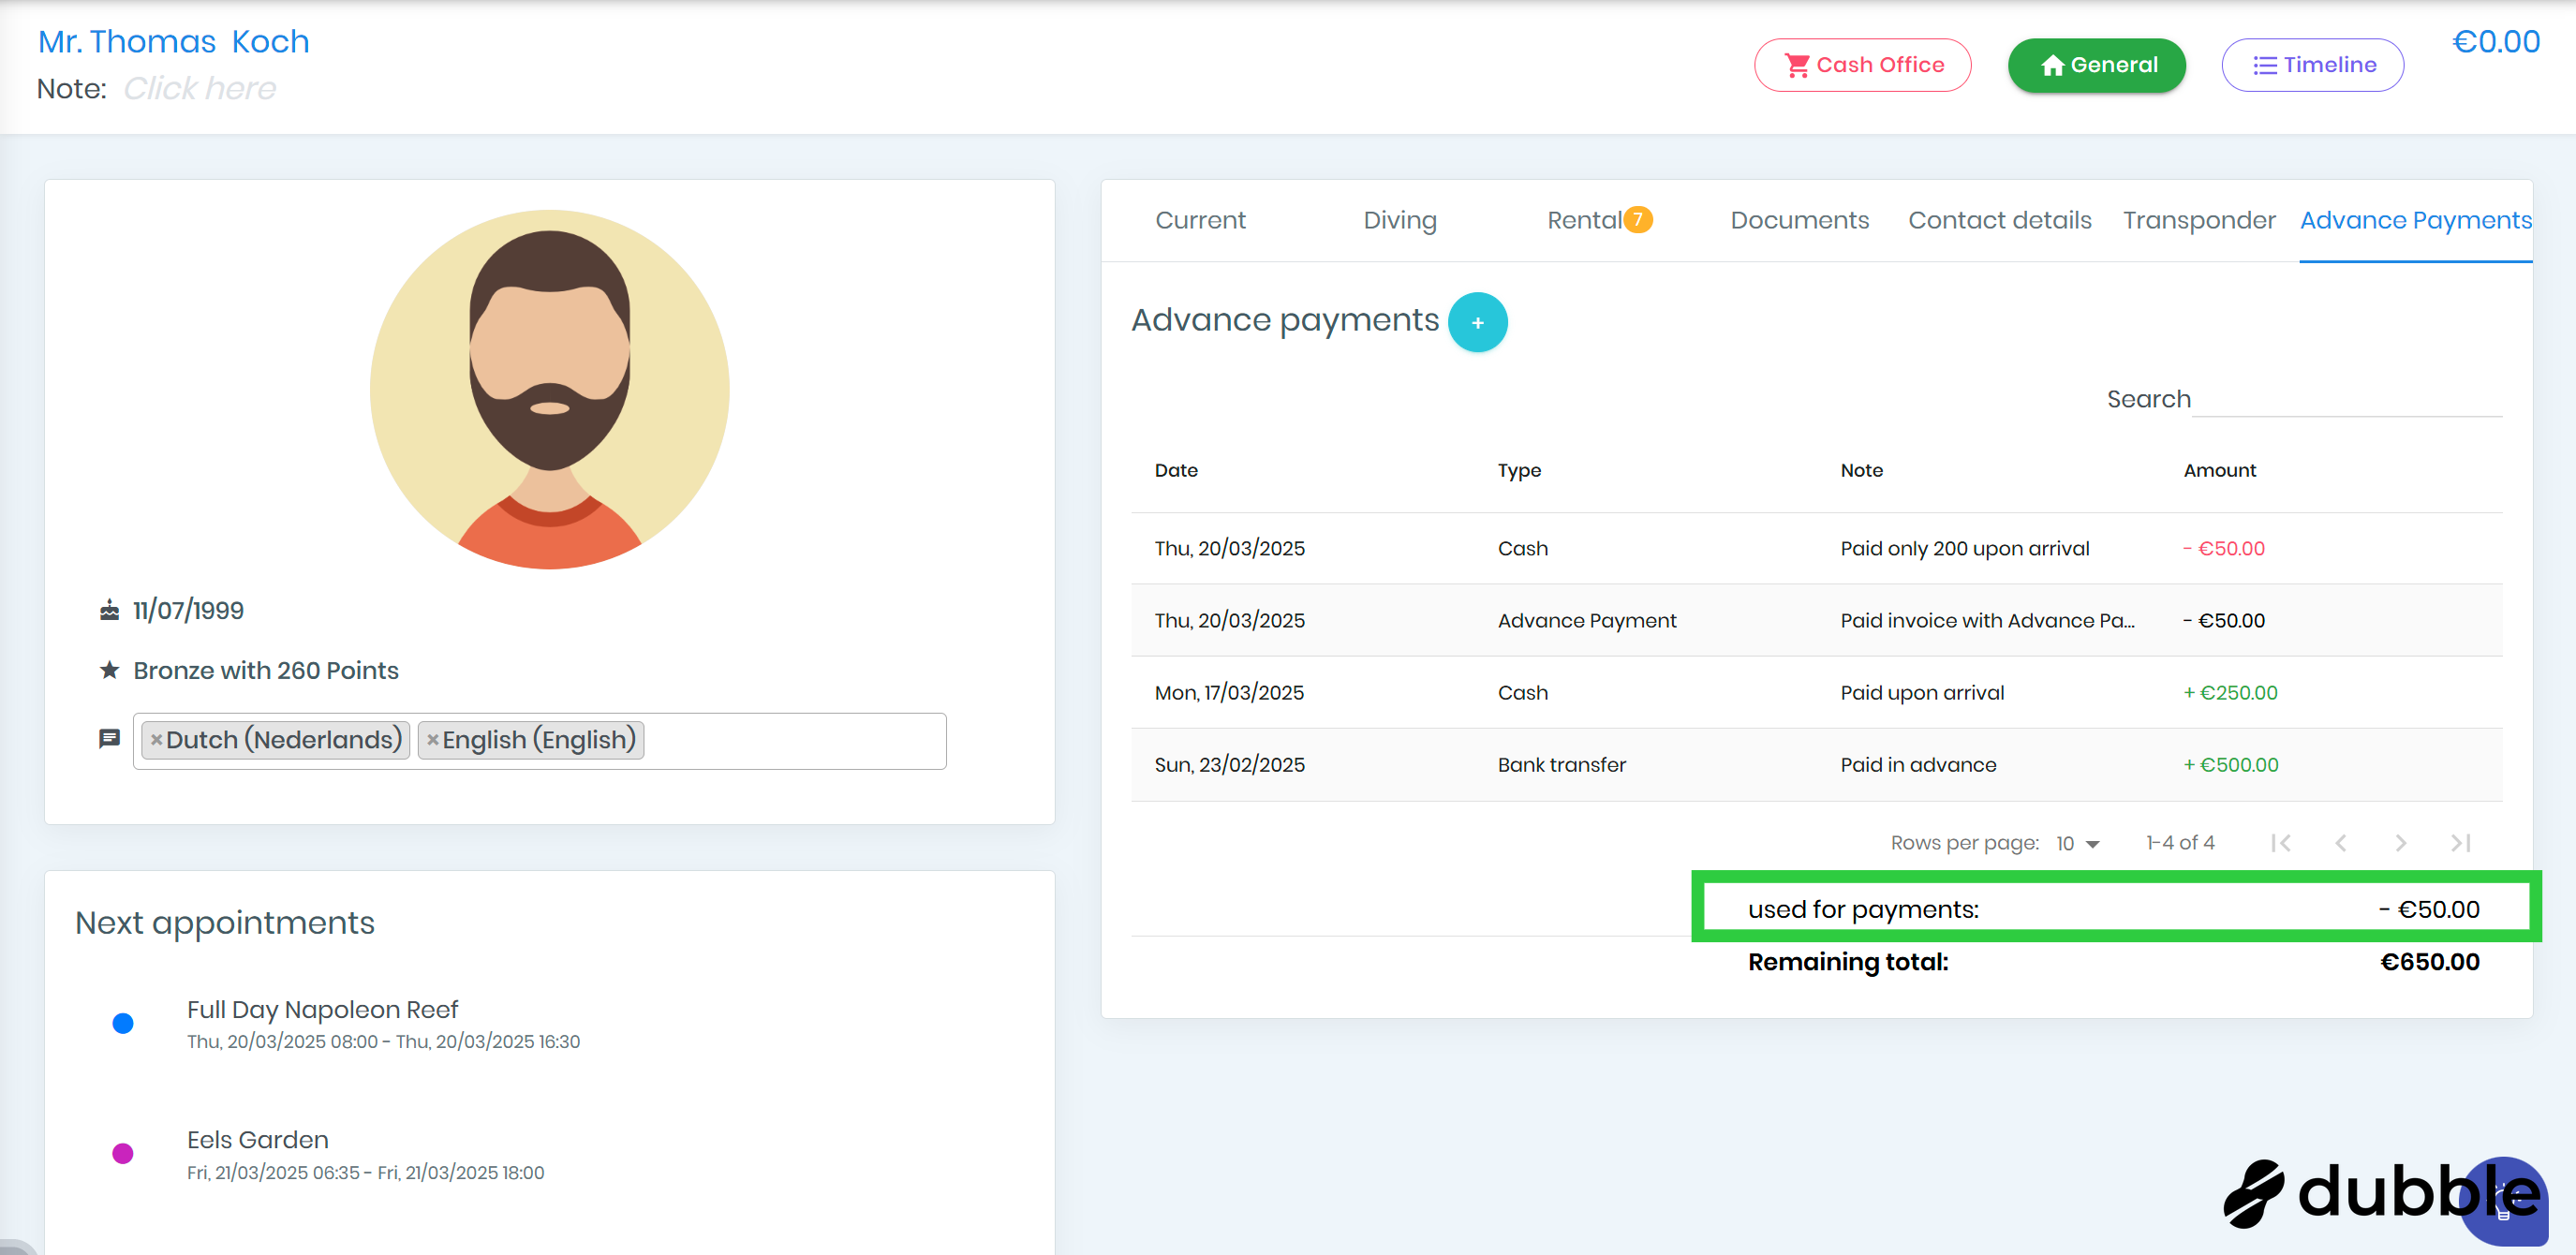
5. Used for paying invoices
The table also shows when and how much of the advanced payment amount has been used for paying invoices.

6. Refund
You can also see when a refund was given.
7. Used for payments
Here, you can see the total amount of advance payments that has already been used for paying invoices.
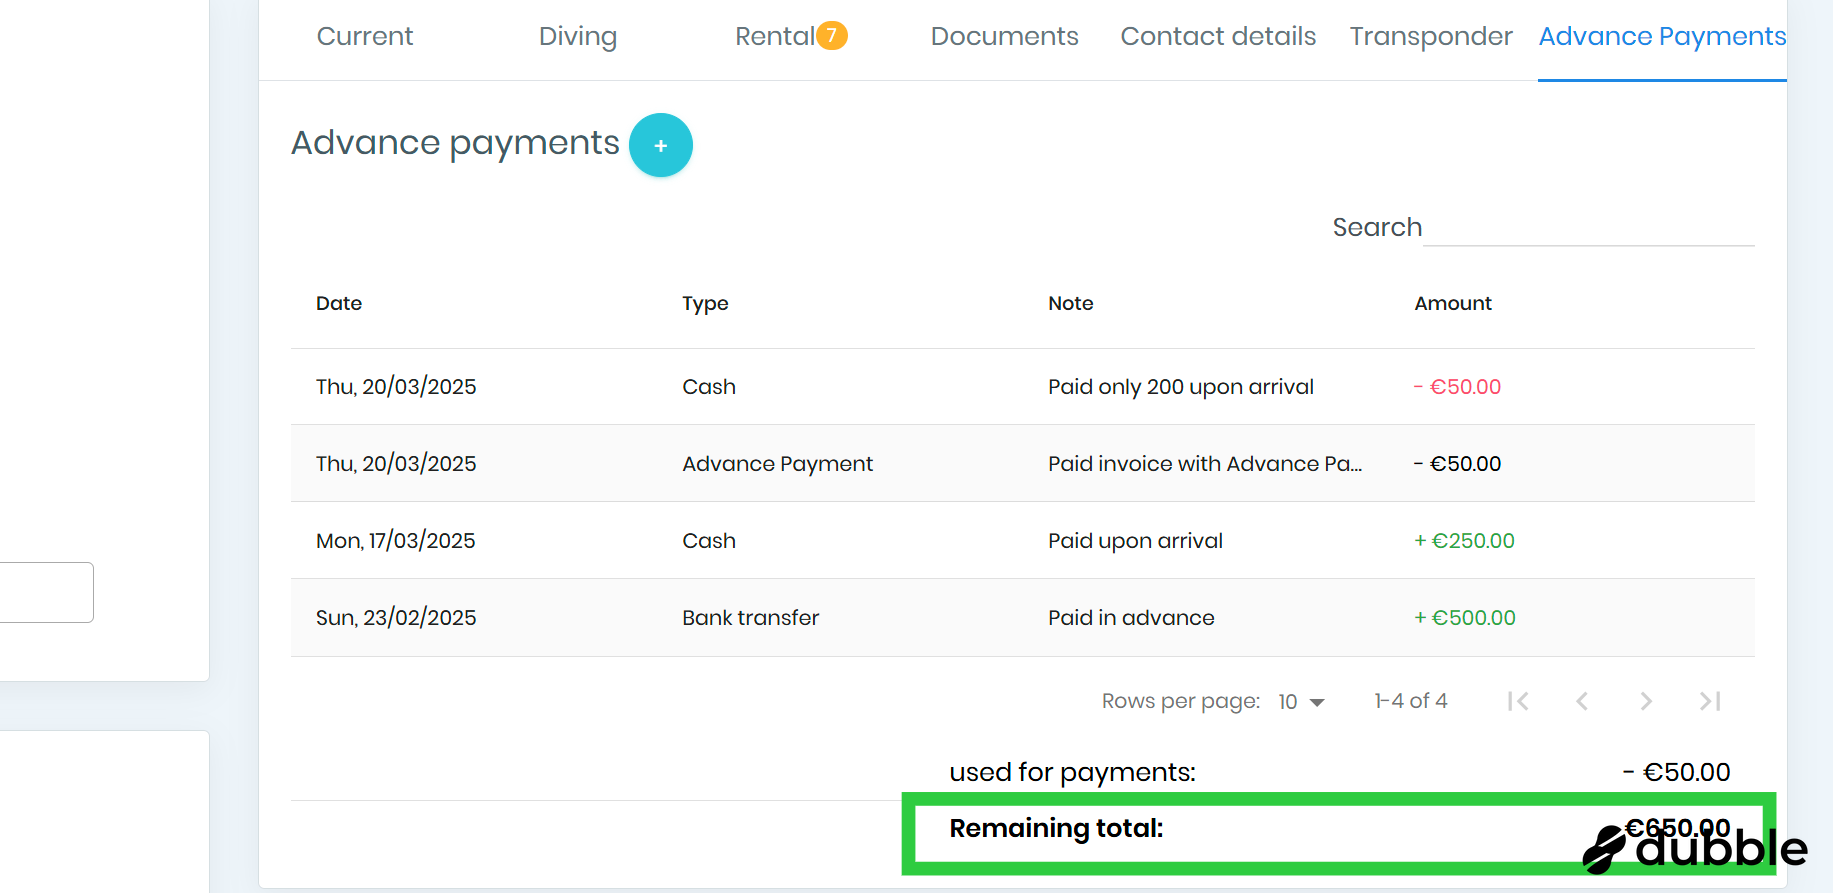
8. Remaining total
Here, you can see the remaining balance of the customer's advance payments. This amount is available in the shopping cart when paying an invoice.
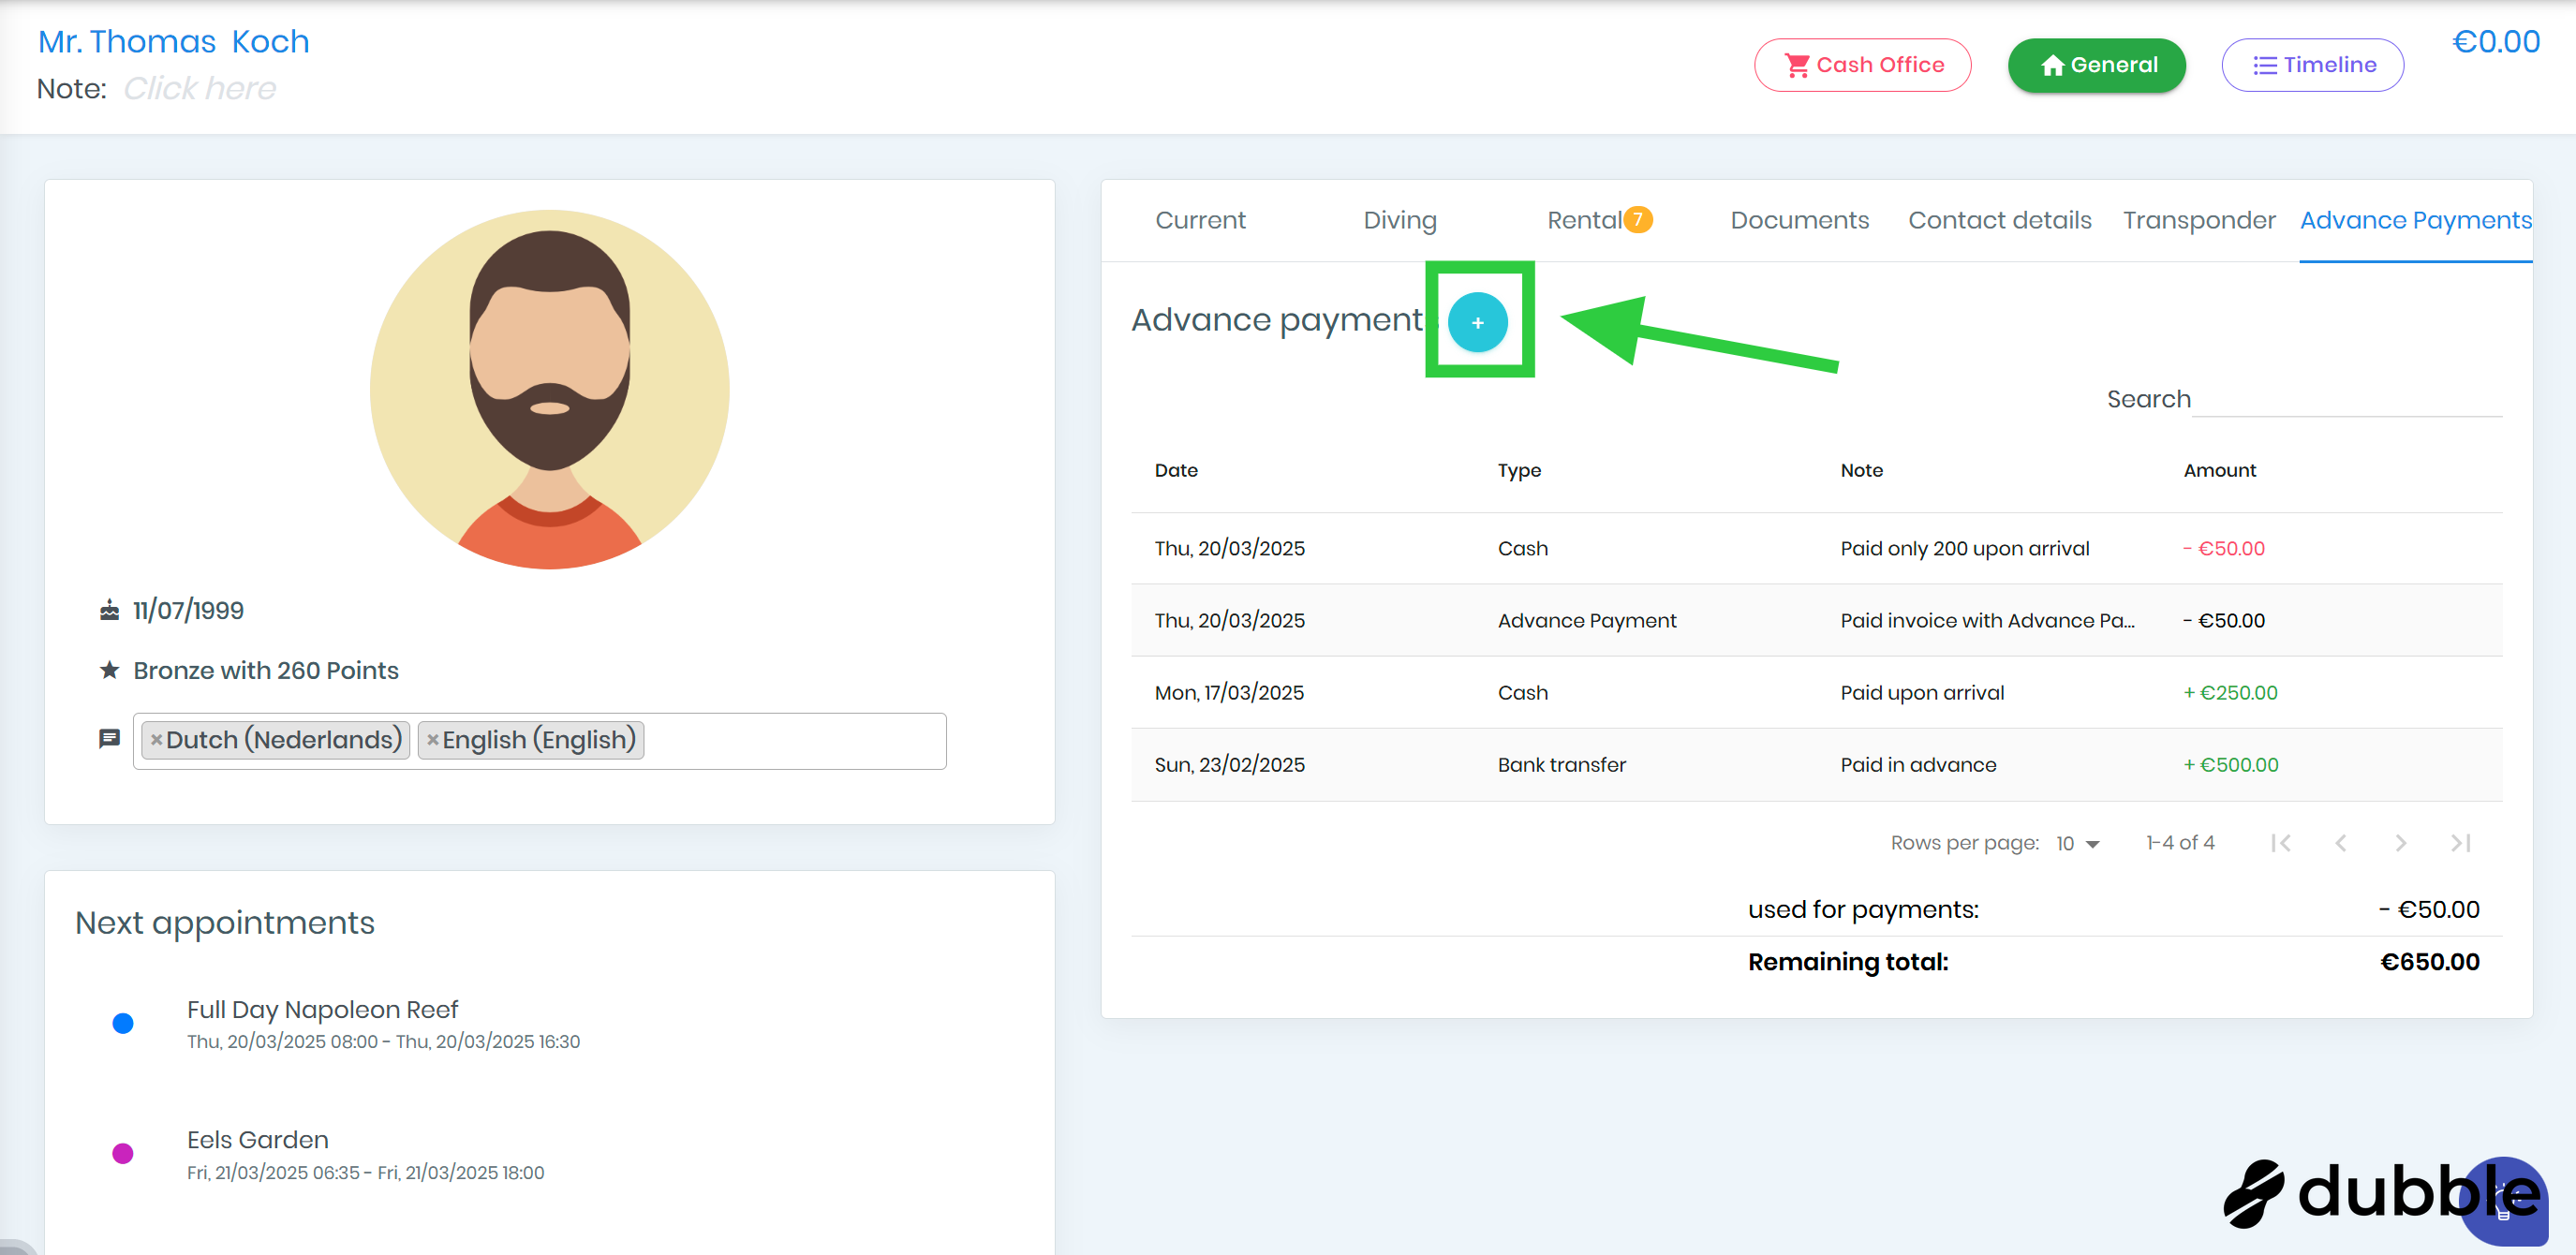
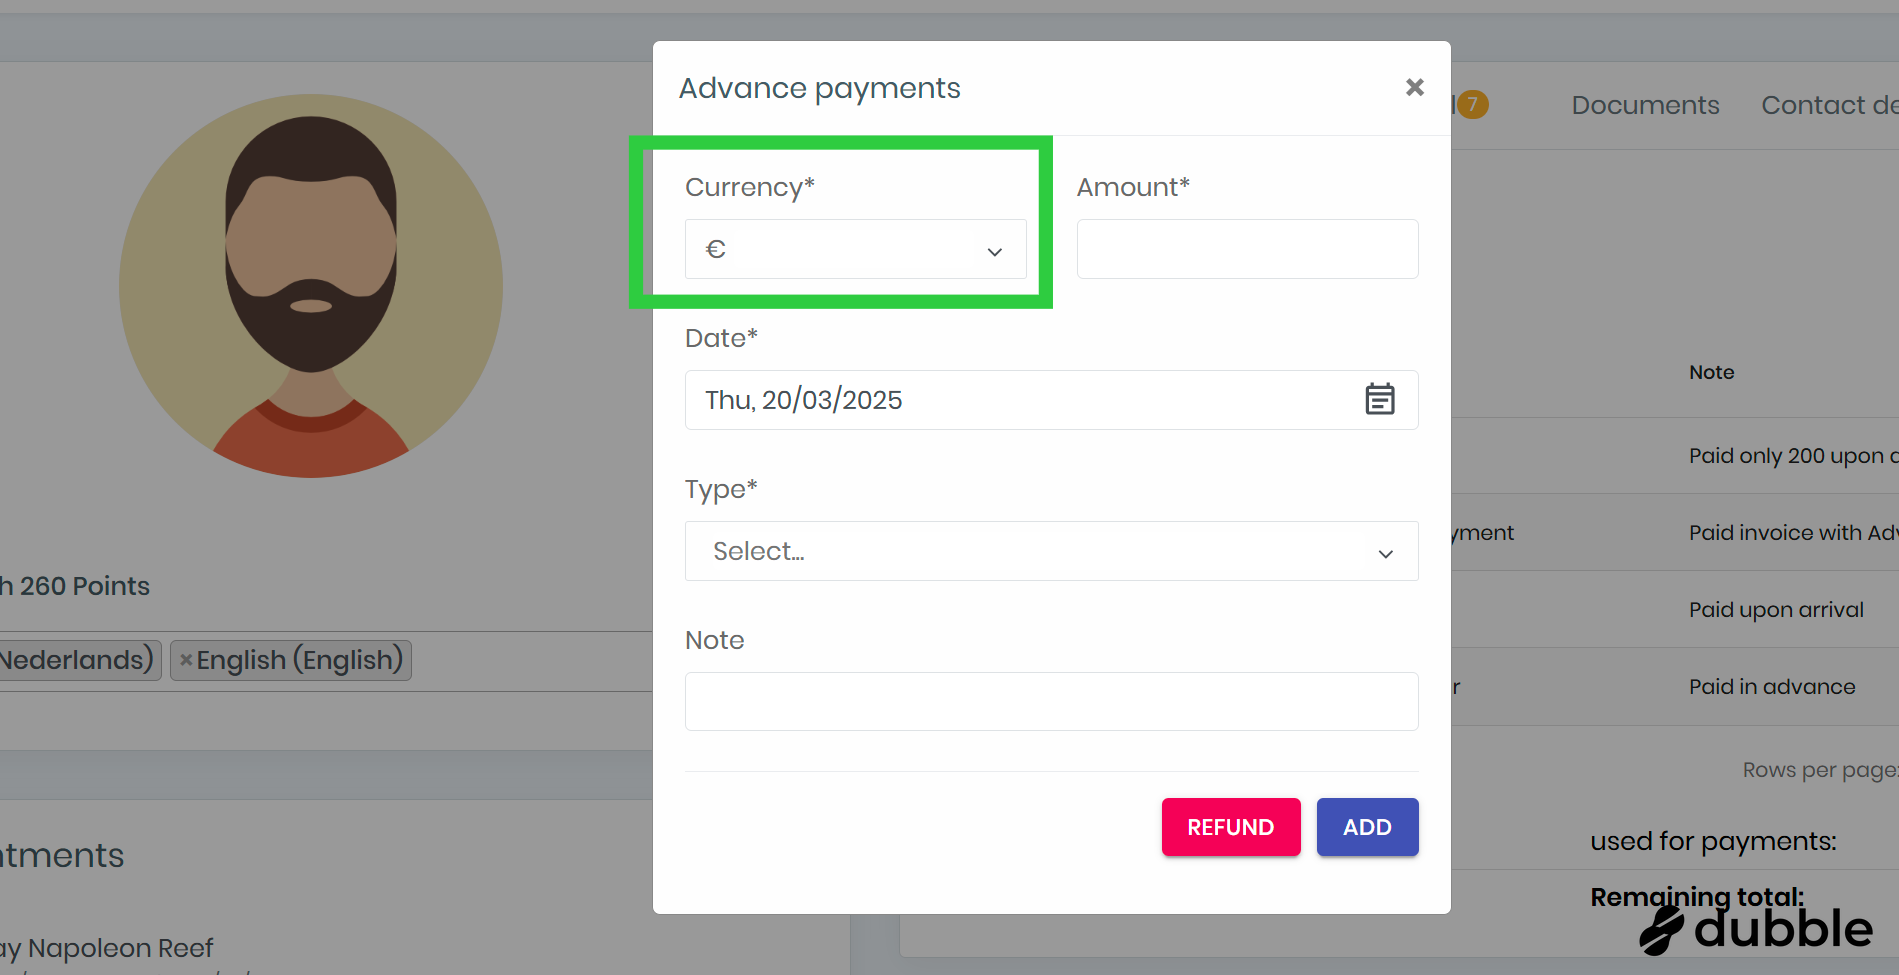
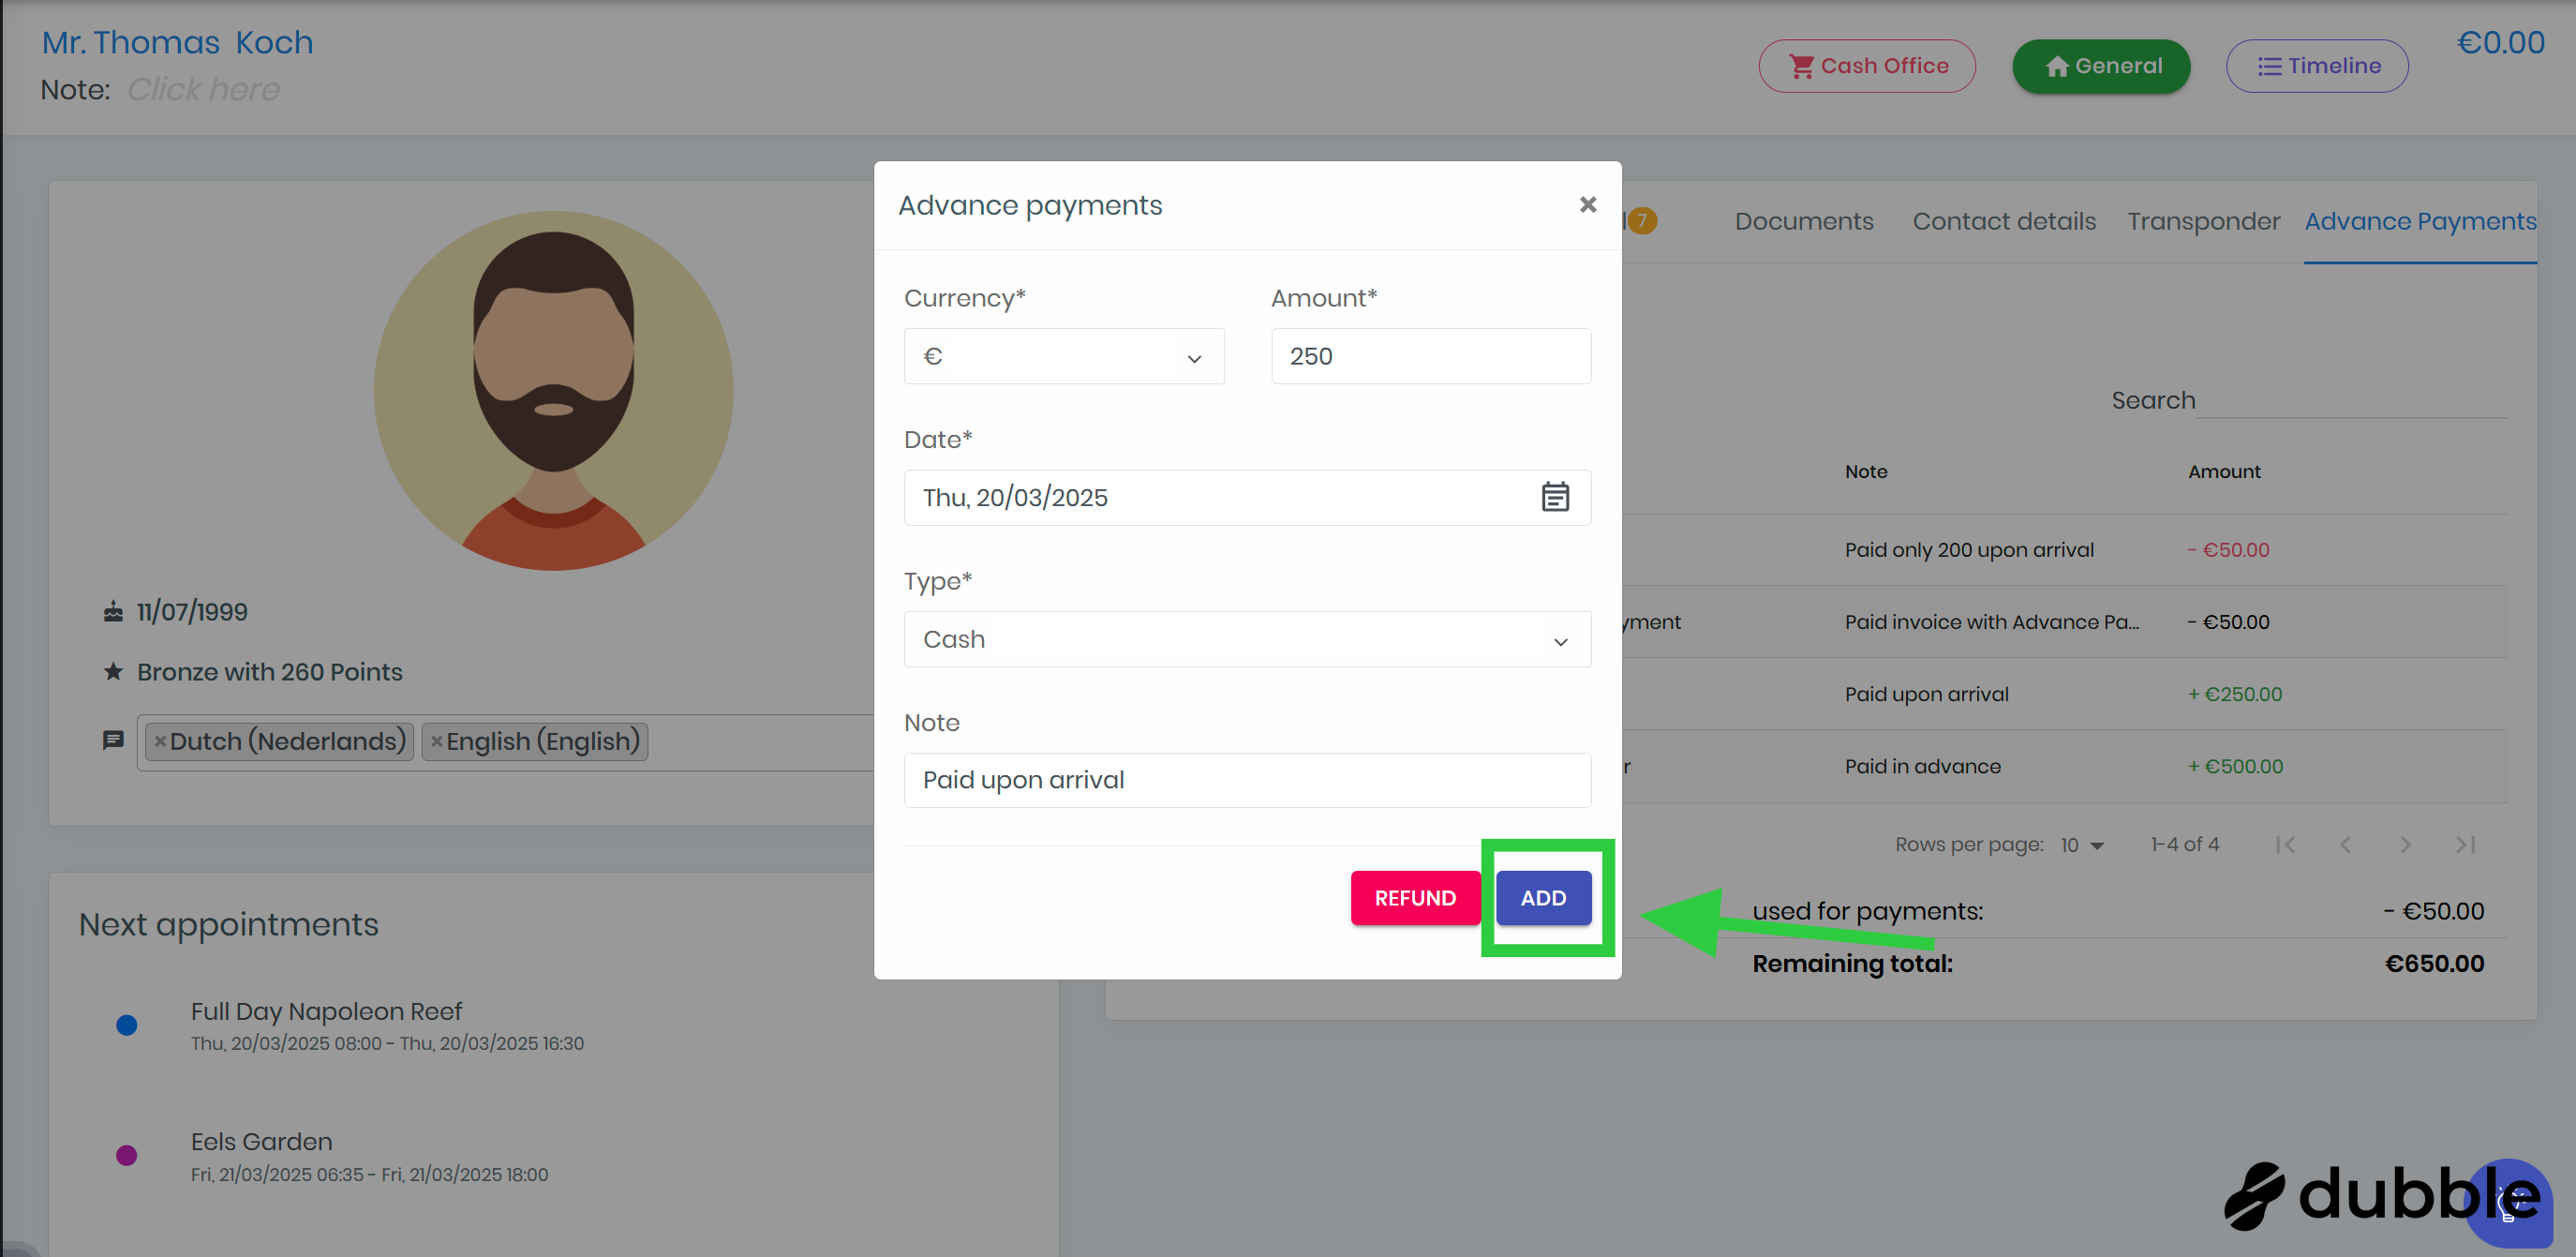
9. Add a new advance payment
Click the ➕ button to add a new advance payment
10. Select the currency
Select in which currency the payment was received.
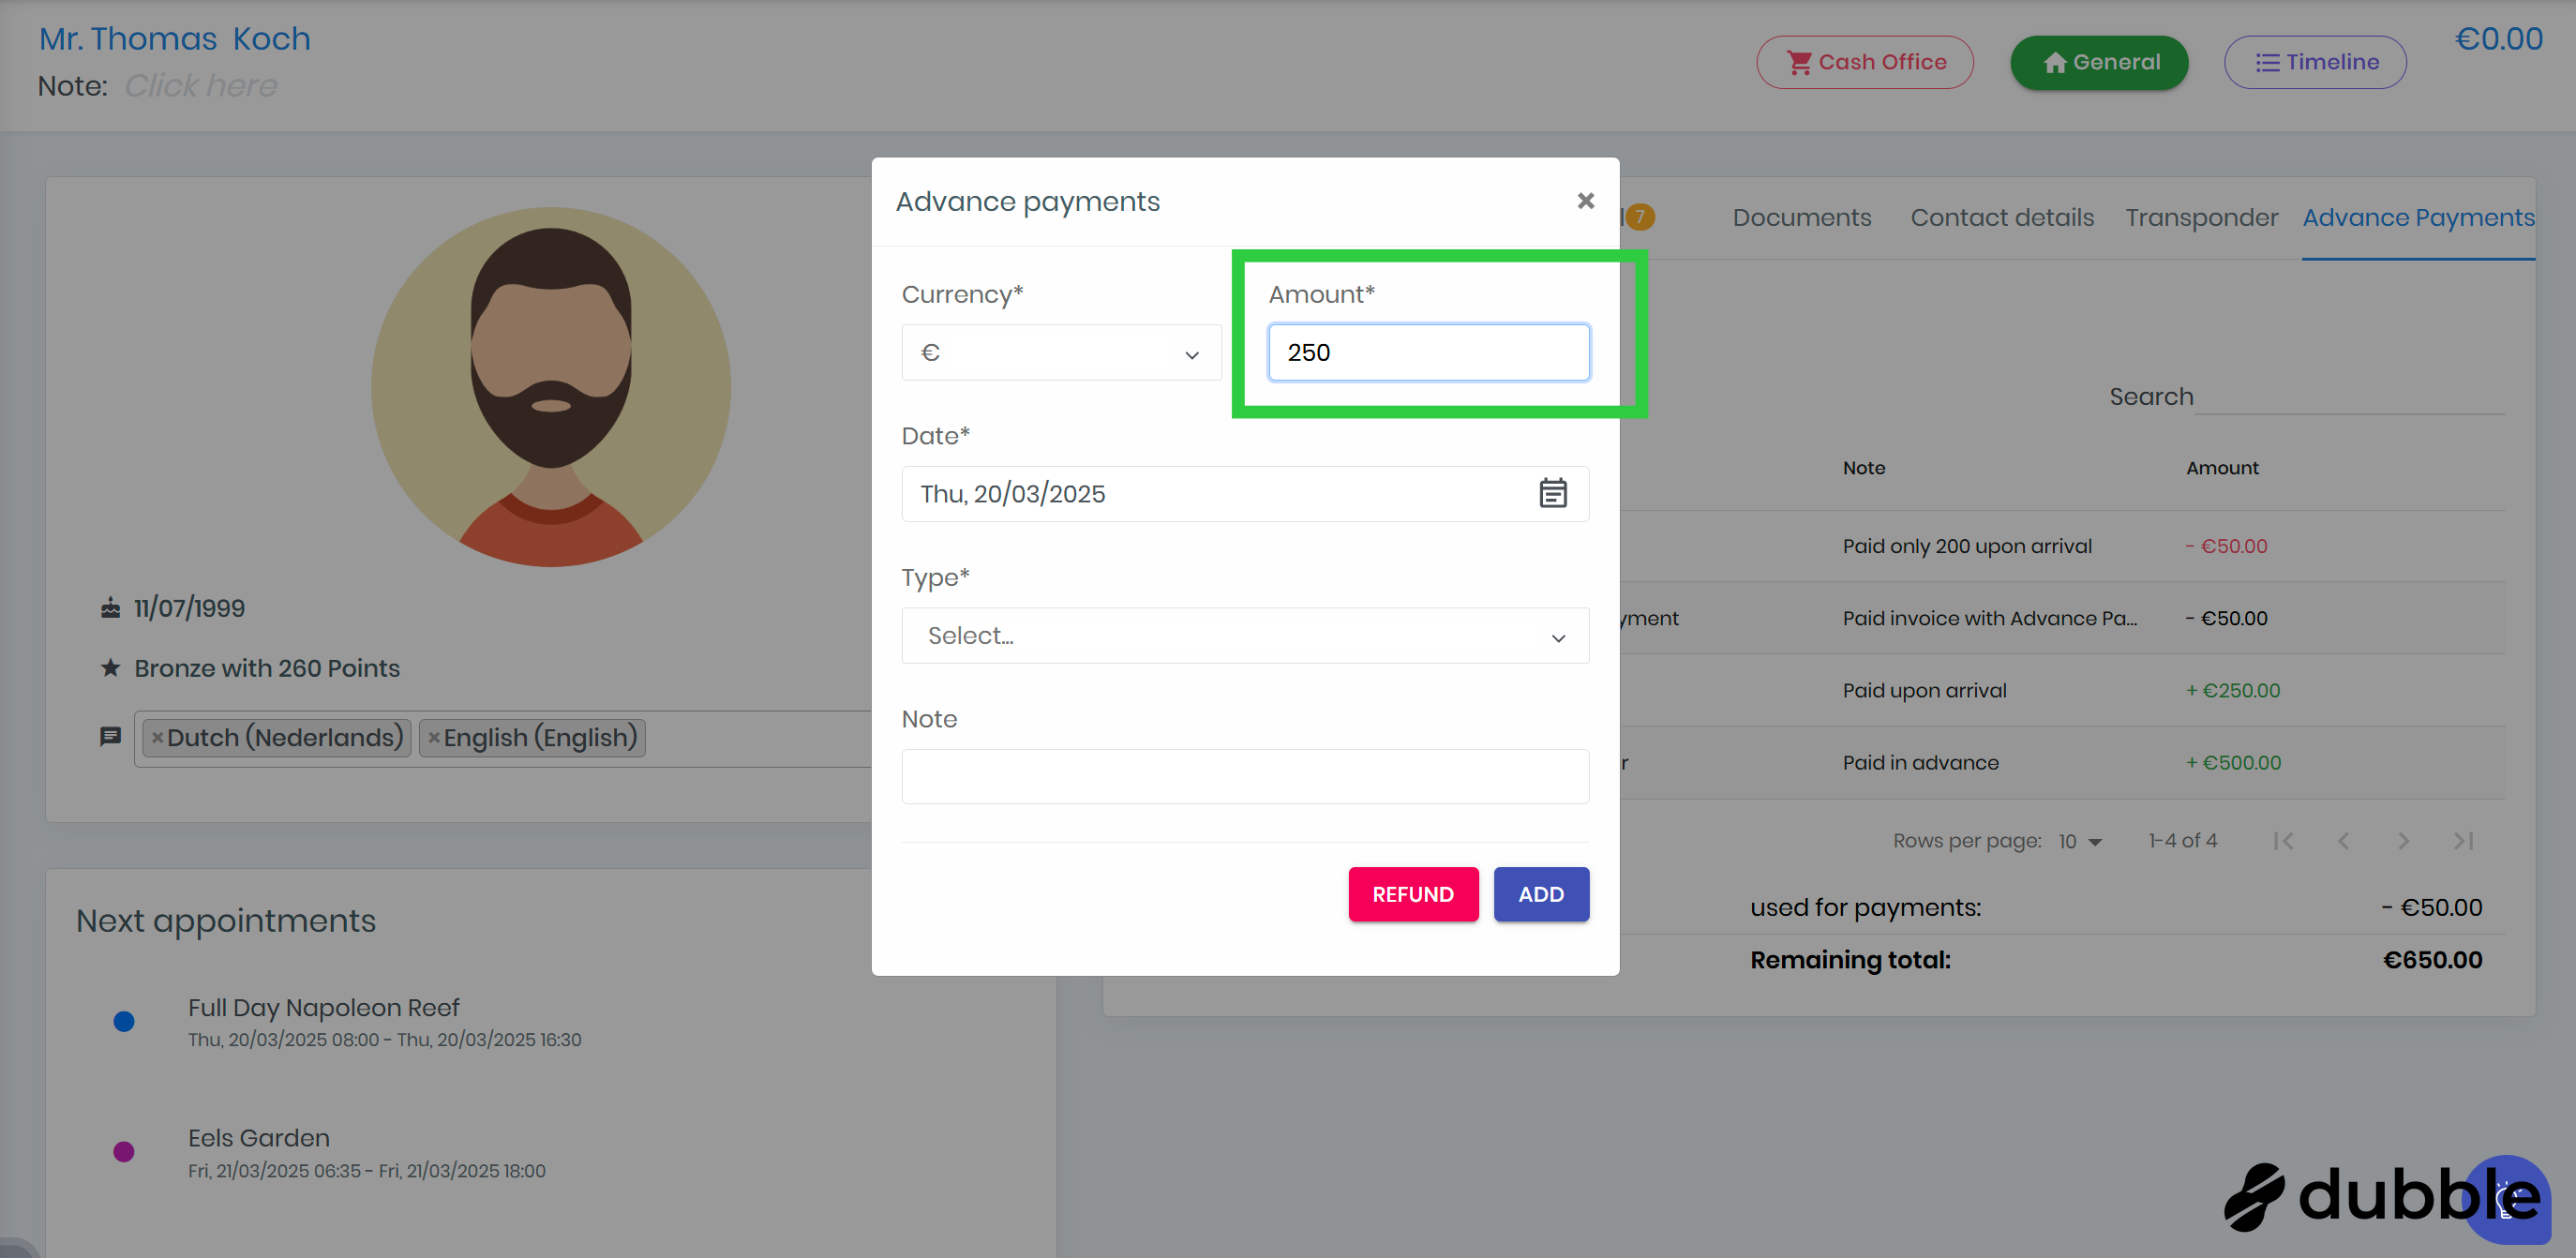
11. Add an amount
Add here how much the advance payment is in the selected currency.
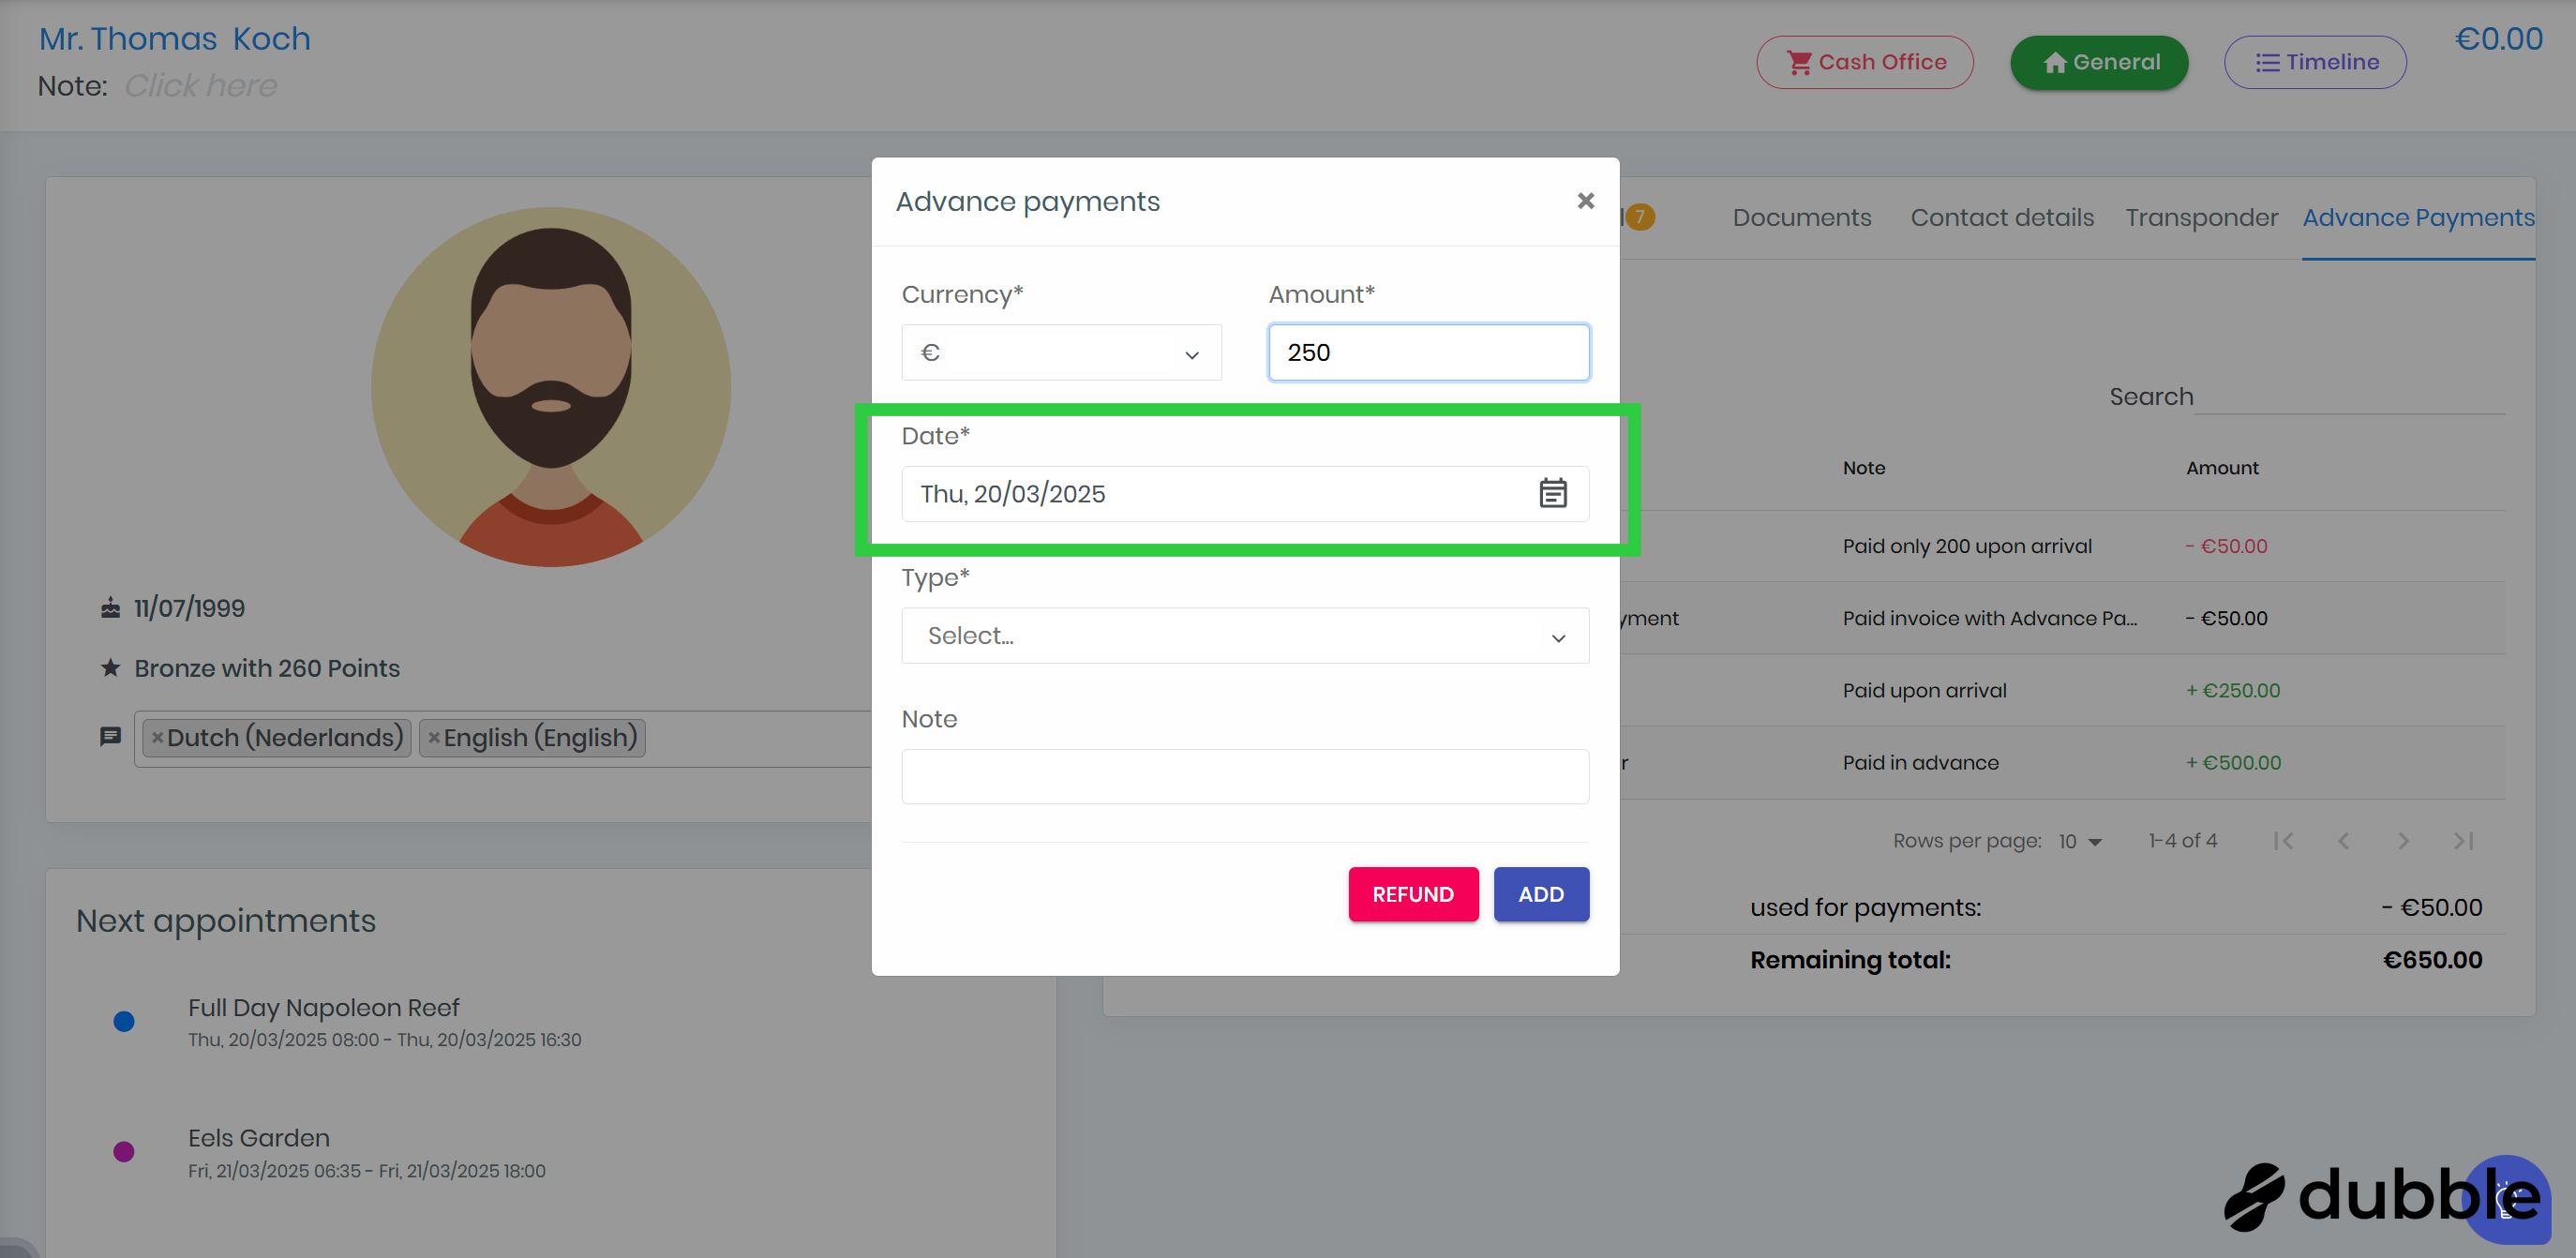
12. Select a date
Select the date you received the advance payment.
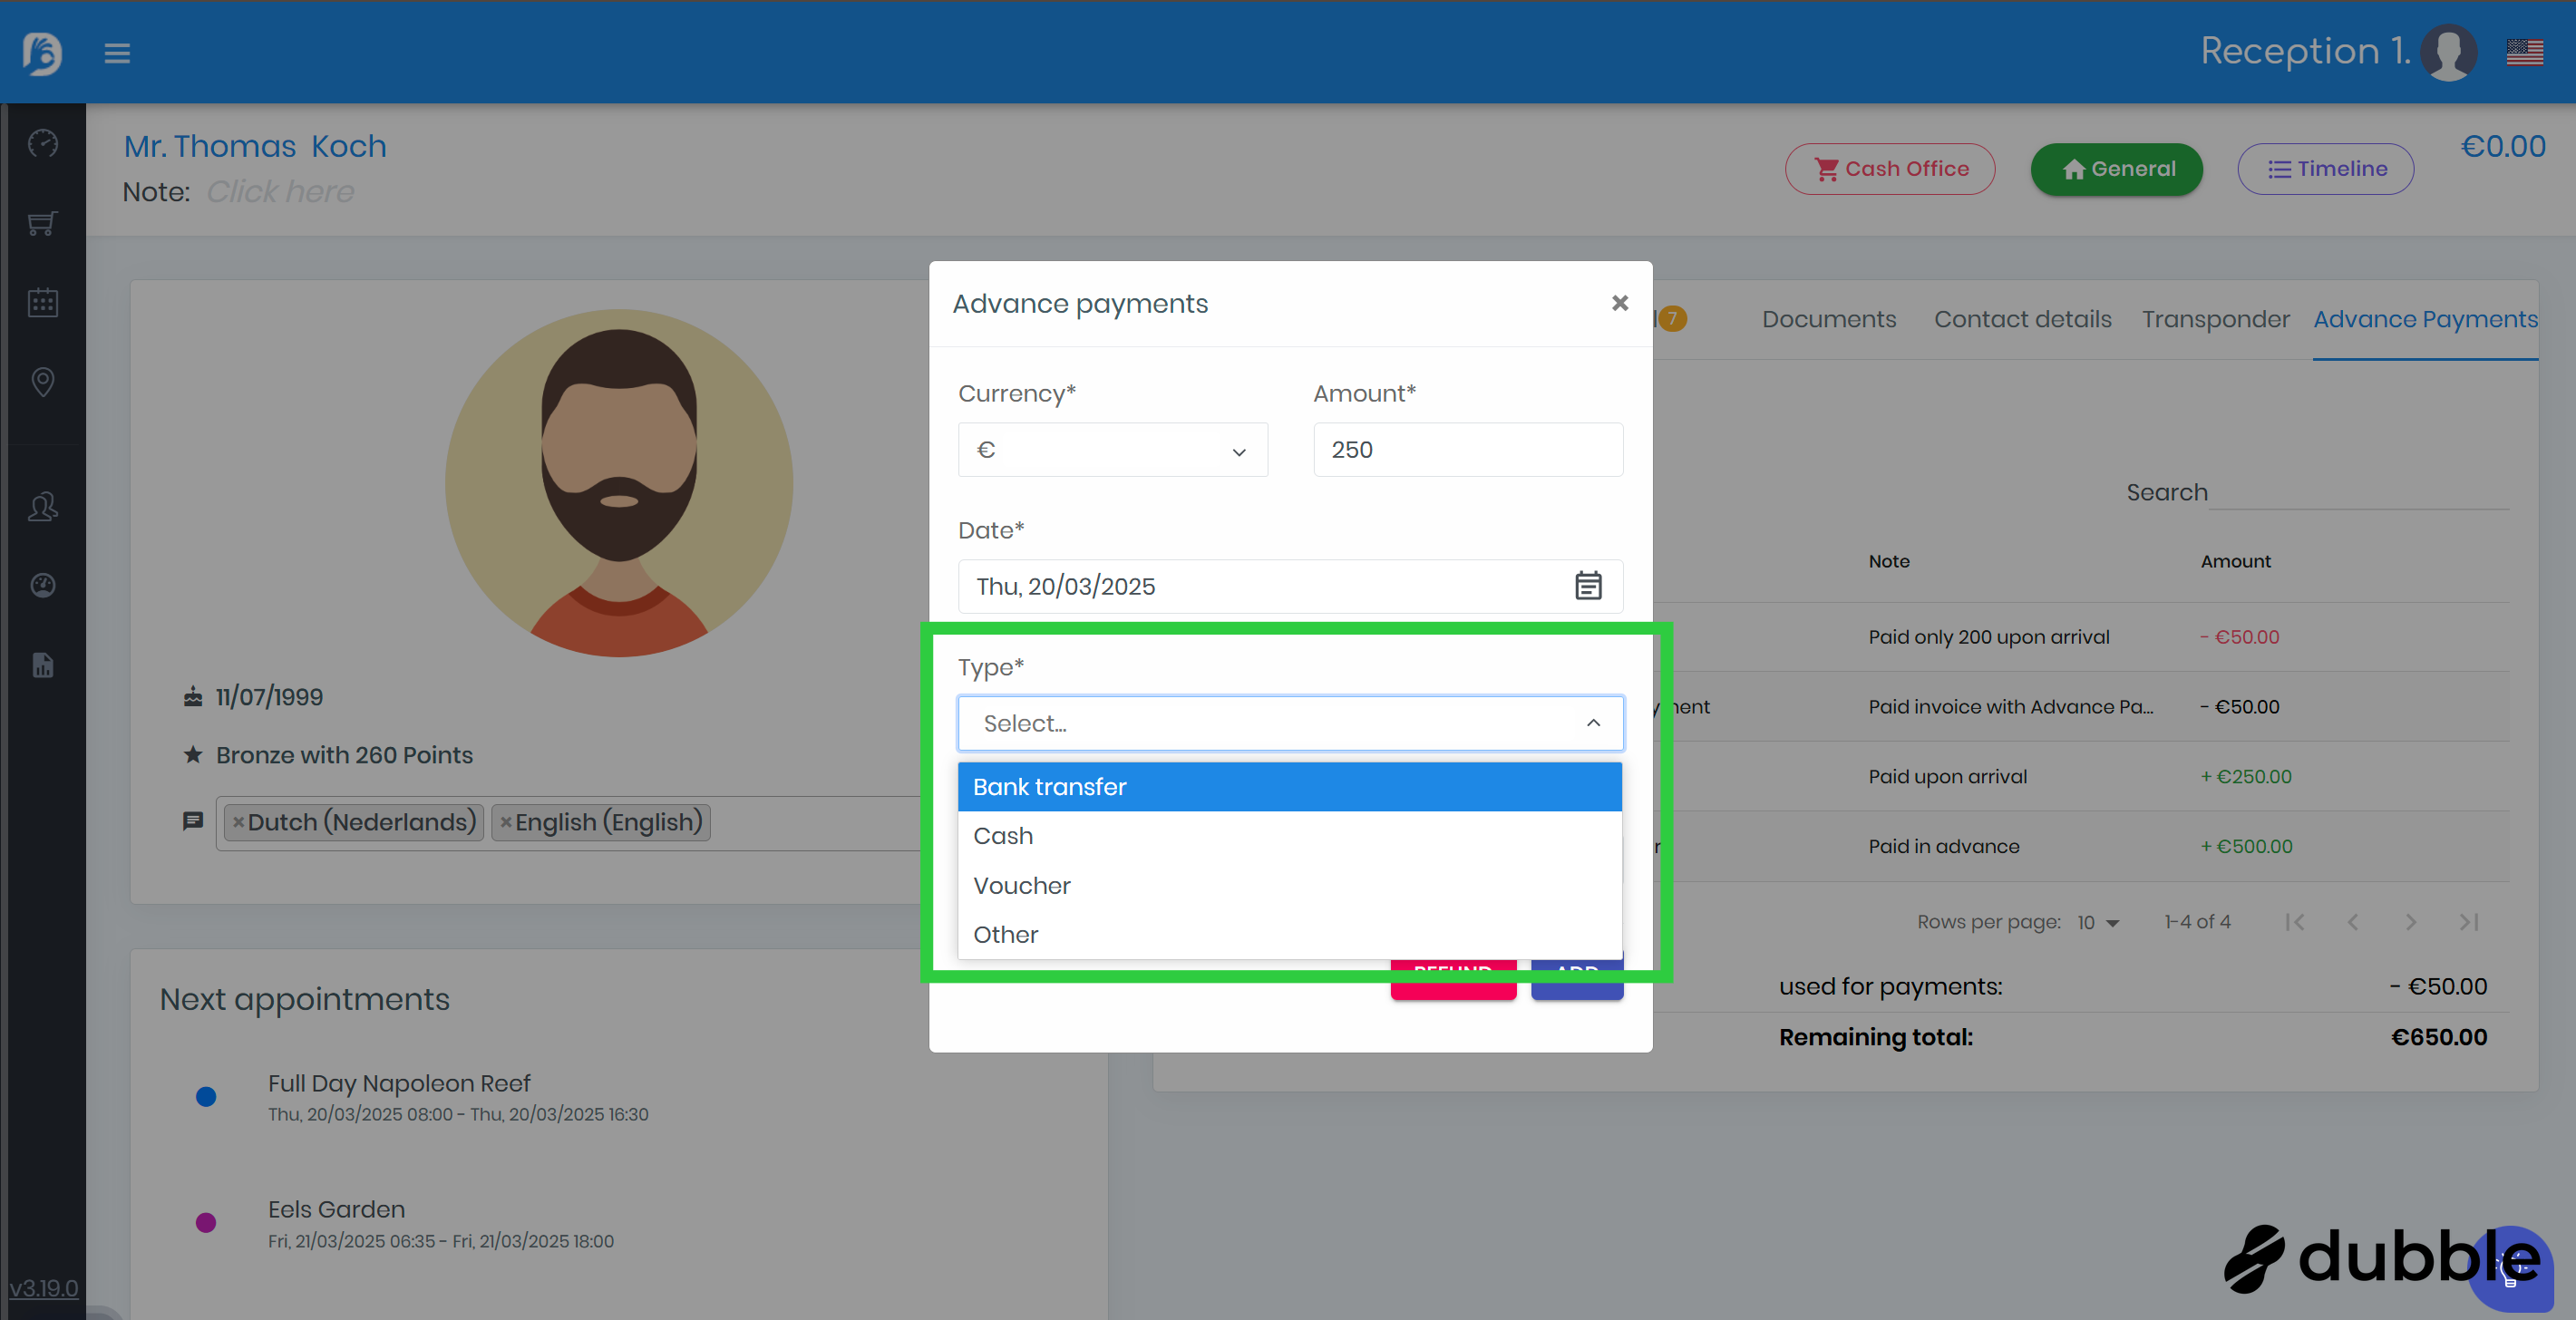
13. Select the type
Select the type for the advance payment.
Types available are:
-
Bank transfer
-
Cash
-
Voucher
-
Other
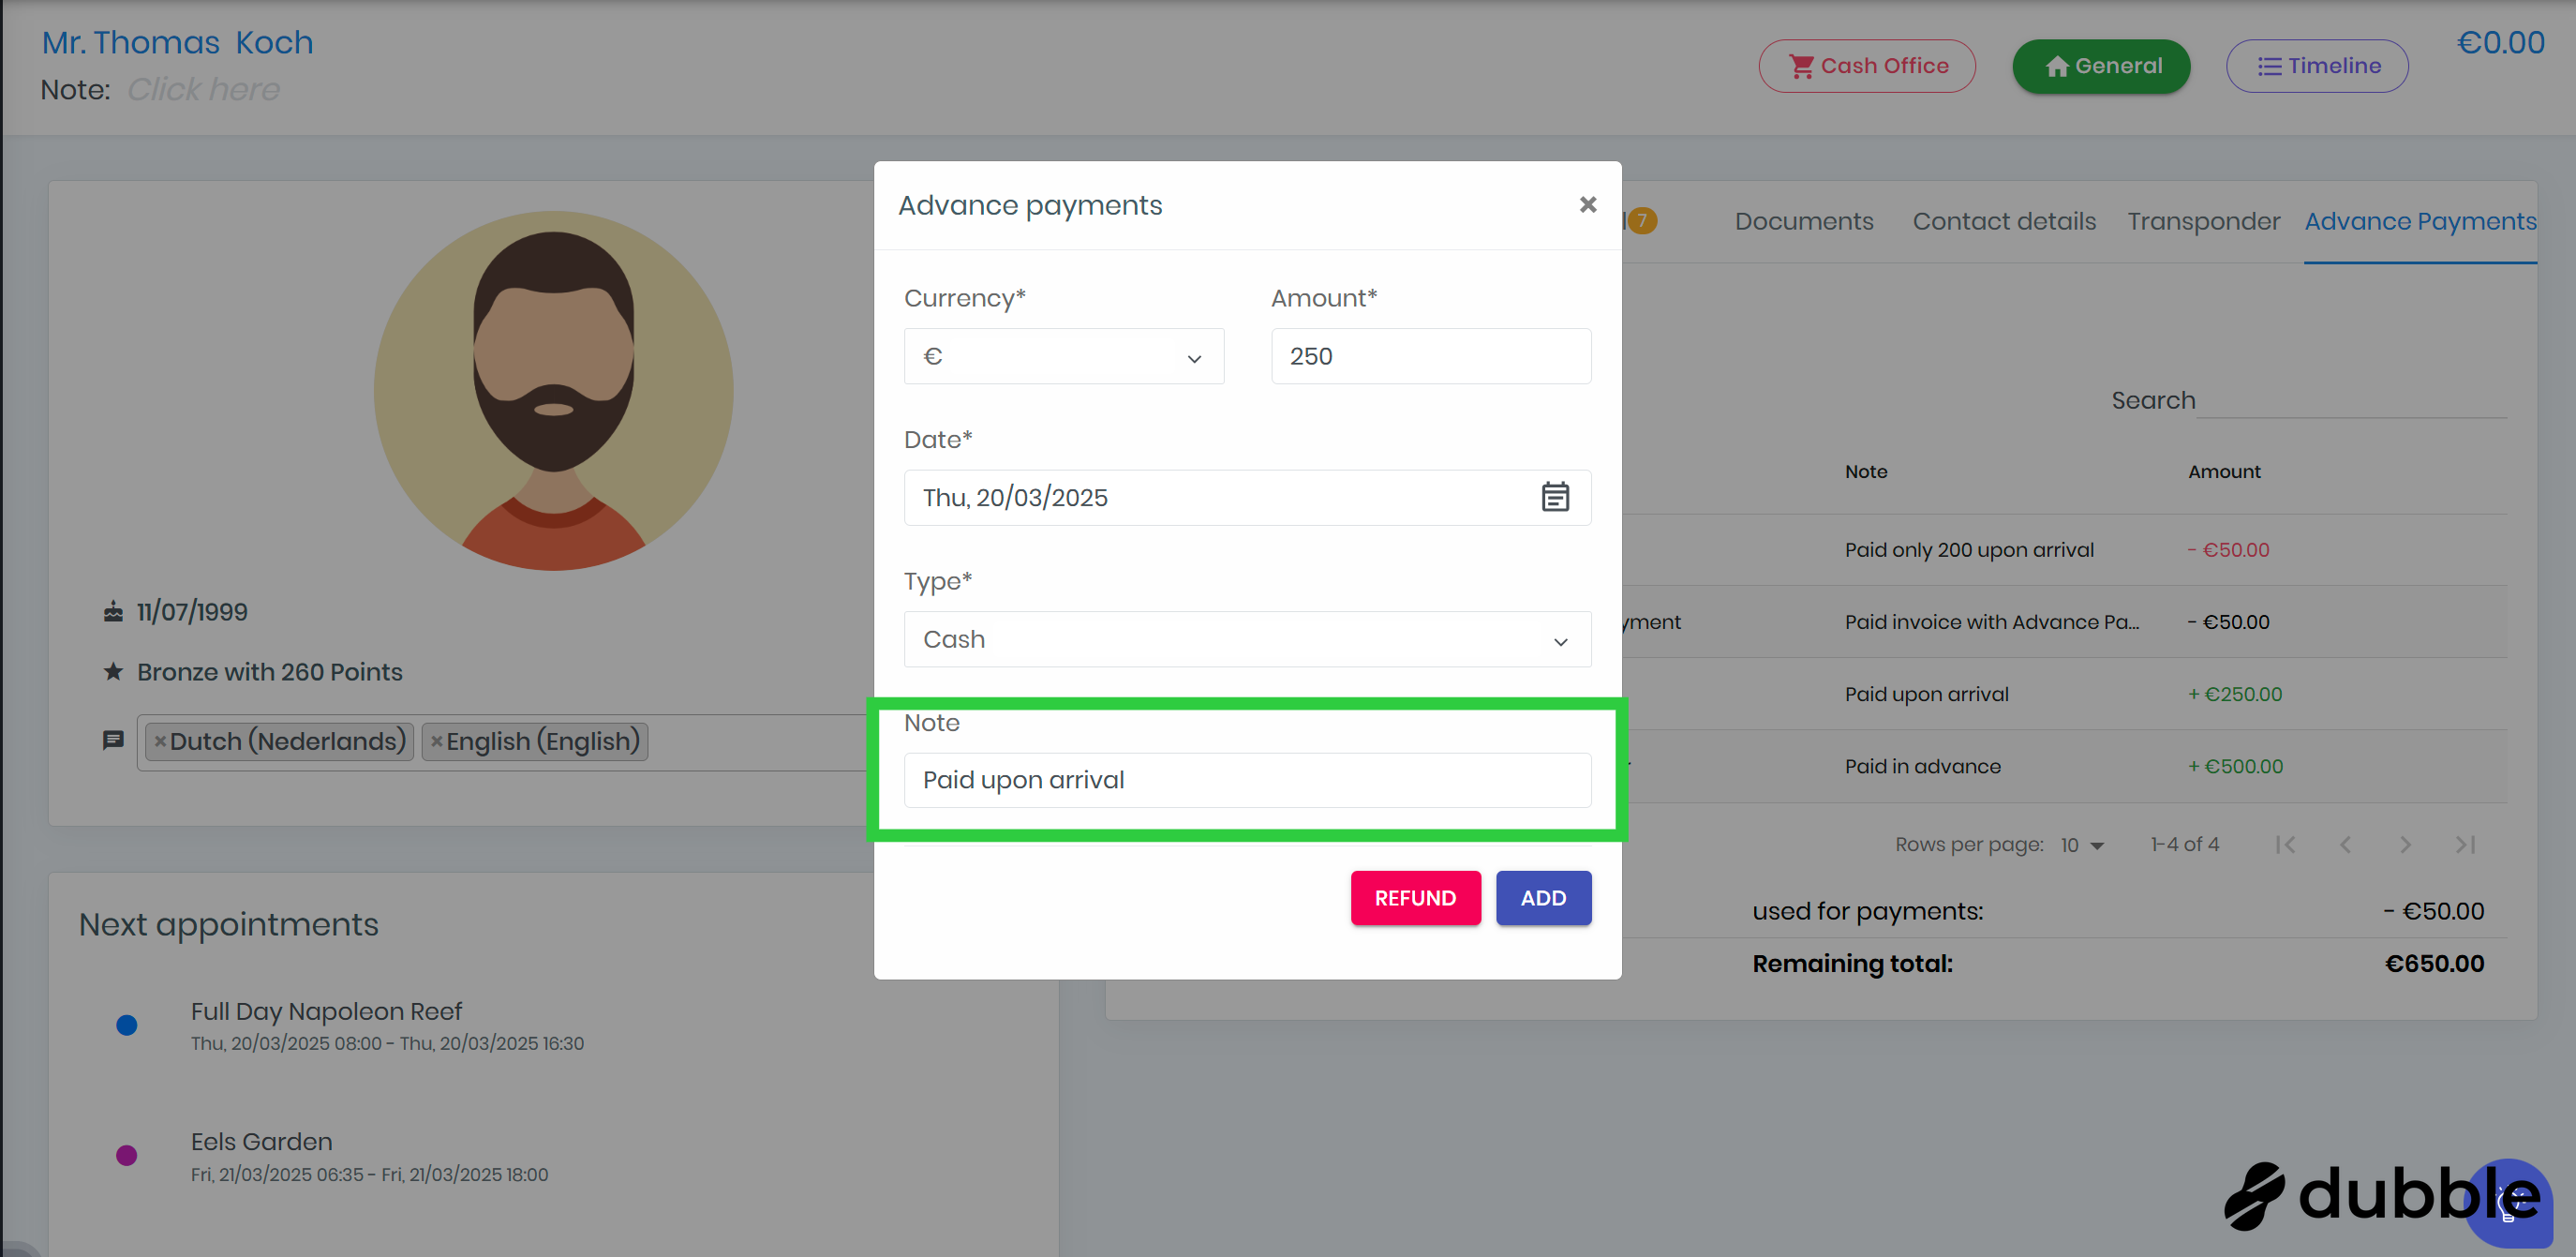
14. Add a note
Optionally you can add a note about the advance payment.
15. Add the advance payment
Click the "Add" button to add the advance payment for the customer.
16. Add a new refund
Click the ➕ button to add a new refund
17. Select the currency
Select in which currency the refund will be given.
18. Add an amount
Add here how much the refund is in the selected currency.
19. Select a date
Select the date you give the refund.
20. Select the type
Select the type of refund.
Types available are:
-
Bank transfer
-
Cash
-
Voucher
-
Other
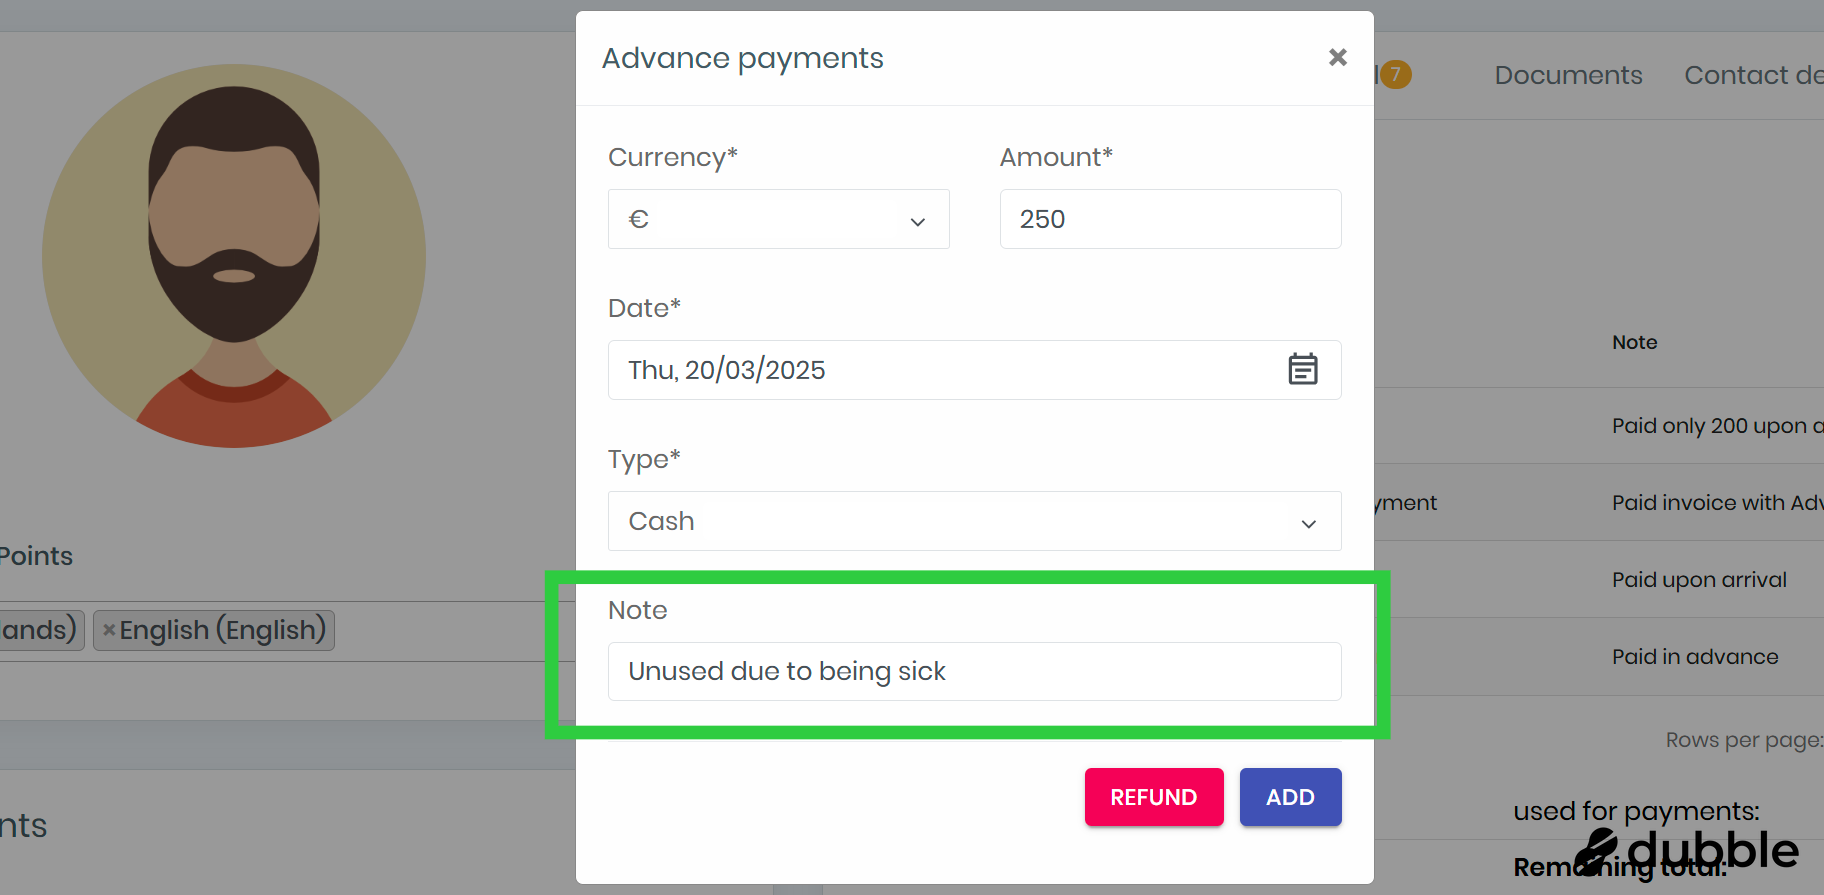
21. Add a note
Optionally you can add a note about the refund.
22. Add the refund
Click the "Refund" button to add the refund for the customer.

Related Articles
Payment method: Advance payments
Learn here how to create an invoice. 1. Click on a customer Click on a customer in the center dashboard. Alternatively, you can search for a customer or go to the customer list and select one there. 2. Make sure the cash office is selected Make sure ...Customer dashboard "Current" overview
Here is an overview of the first tab "current" of the customer dashboard. 1. Click on a customer Click on a customer in the center dashboard. Alternatively, you can search for a customer or go to the customer list and select one there. 2. Click on ...Customer dashboard "Documents" overview
Here is an overview of the tab "Documents" of the customer dashboard. 1. Click on a customer Click on a customer in the center dashboard. Alternatively, you can search for a customer or go to the customer list and select one there. 2. Click on ...Customer dashboard "Diving" overview
Here is an overview of the second tab "diving" of the customer dashboard. 1. Click on a customer Click on a customer in the center dashboard. Alternatively, you can search for a customer or go to the customer list and select one there. 2. Click on ...Customer dashboard "Rental" overview
Here is an overview of the third tab "Rental" of the customer dashboard. 1. Click on a customer Click on a customer in the center dashboard. Alternatively, you can search for a customer or go to the customer list and select one there. 2. Click on ...